All Photos
713
0
1
Posted on 06-14-2016
Spring Floral
by NinaB
Posted on Apr 13, 2024
17 Views | 0 Likes 0 Comments
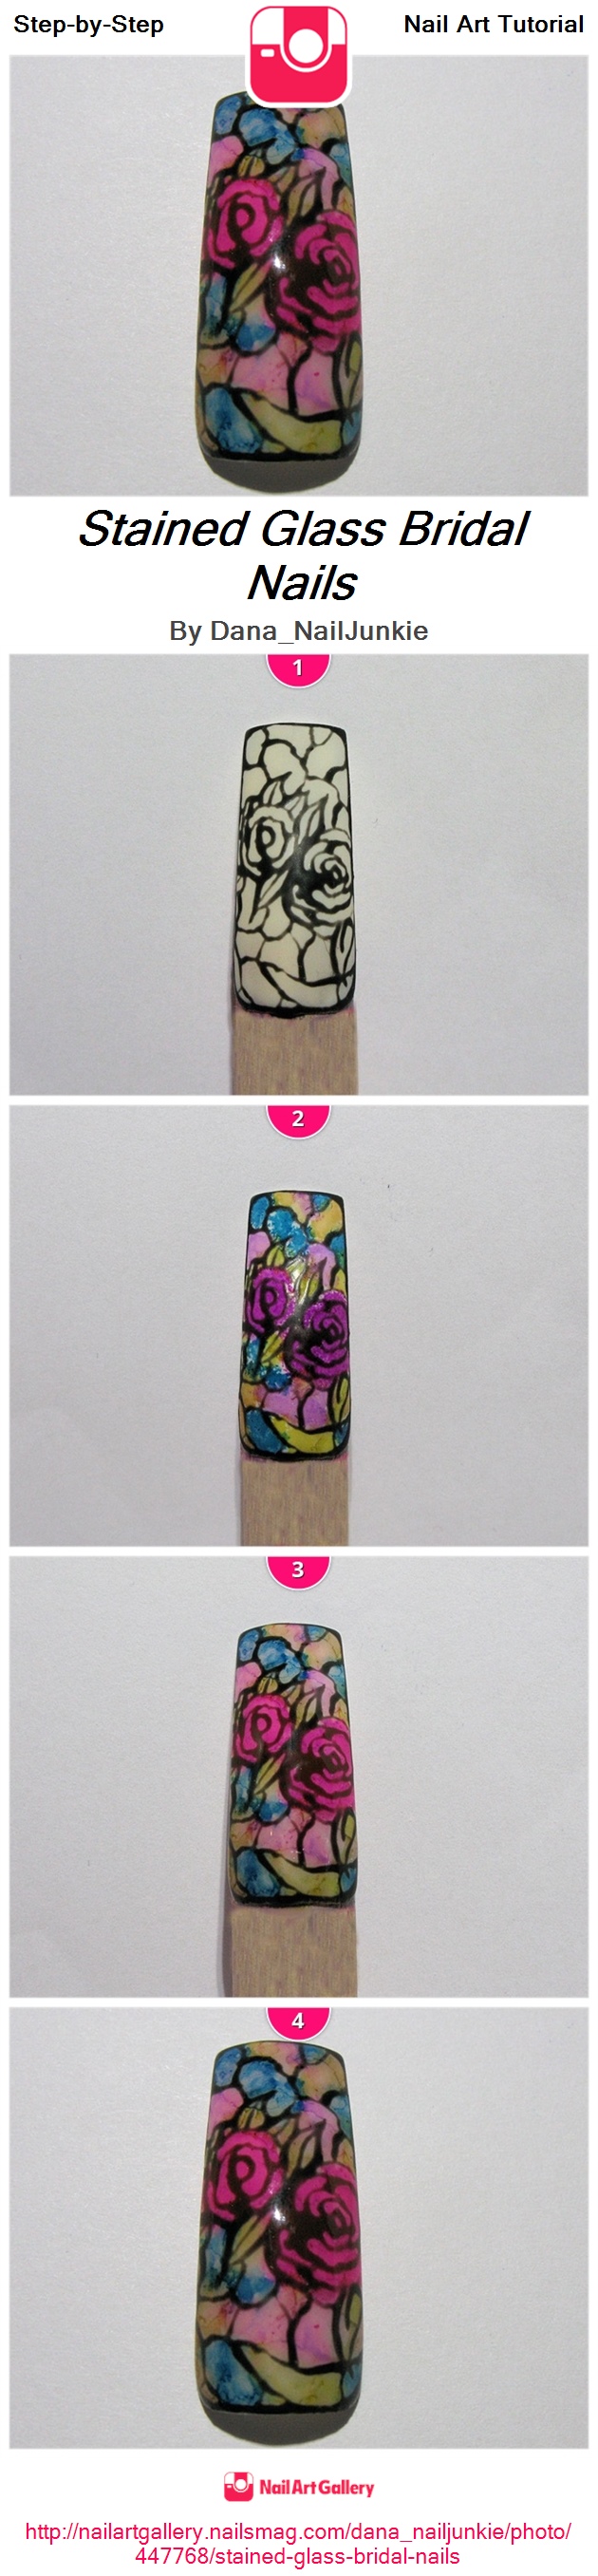
<a href='http://nailartgallery.nailsmag.com/dana_nailjunkie/photo/447768/stained-glass-bridal-nails?ref=side-embed'><img src='http://s3photo.nailartgallery.nailsmag.com/34e42fcf-201c-460d-b234-fe976ad11bdc_set.jpg' alt='Stained Glass Bridal Nails - Nail Art Gallery' /></a> Copy and paste the embed code above to put this step-by-step nail art tutorial on your web site.
Prep your natural nail for application. Use a buff/nude gel polish for the base. Cure, and wipe of tack layer. Then create your design using black gel polish. Create your flowers first, then design around them. This is random designing, so you're free to do it however you'd like.
After curing and removing the tacky layer from your design, use tweezers to hold a piece of sponge to place all different colors of the alcohol inks inside your lines.
Take a clean piece of sponge & get a bit of alcohol on it. Dab it onto the colored inks to make them appear like they are a watercolor.
Let the ink dry a bit, and topcoat with gel to finish!