This week our challenge is sponsored by ORLY. In honor of their new line of polishes, Pastel City, we were to design 10 nail tips inspired by street art. We were only allowed to use ORLY polishes in pastel shades. We could also use white, but no darks such as black or grey for shading.
Street art is a form of human expression. Art is beautiful, and so are pastel shades. So I I thought that creating a beautiful set of street art nails in ORLY’S new collection “Pastel City” was a great idea!
As I stated above, street art is a form of expression. While sometimes bad street art can ruin a very nice downtown building making all neighborhoods seem run-down and uninviting, there are places that have been beautified by amazing works of art in so many cities of the world. These buildings have been used as a canvas for amazing reasons. Maybe it’s to be political. Maybe it’s to raise awareness, or maybe just because “Art Is Beauty.” To me, all art is beauty, not a crime. I used my ten nail tips to relay my expressions, and my feelings to you.
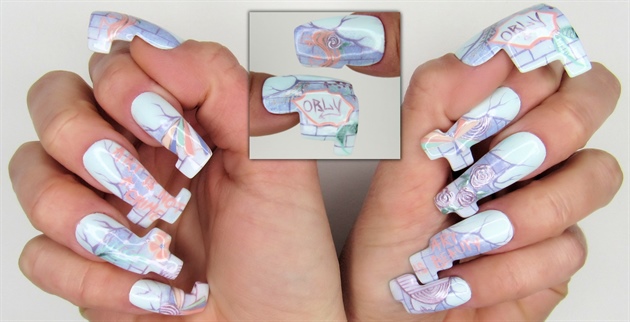
I extended my nail tips in a brick pattern to give it more of an edge, and I stuck with beautiful images cascading across the nails in pastel. Pastel street art is hard to come by, although, I did find a few images that matched the theme. I took most of my inspiration from street art that was created around nature and beauty.
Step-by-Step Nail Art Tutorial
1
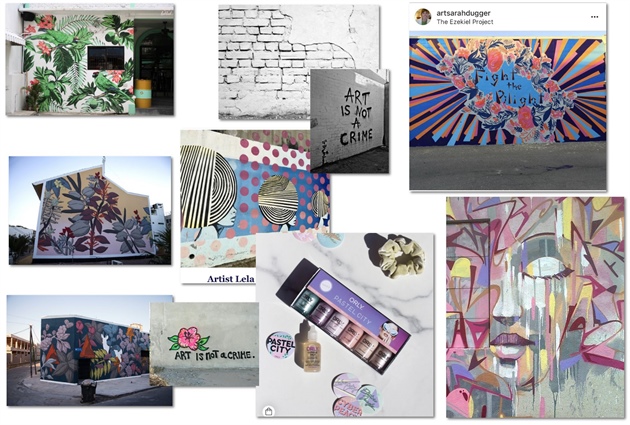
Pastel street art is hard to come by, although, I did find a few images that matched the theme. I took most of my inspiration from street art that was created around nature and beauty. Silhouettes, and floral paintings are beautiful. The "Fight The Blight" street art in the upper right corner of this image is local to me, and I have been admiring it since last summer. Street art is about empowering yourself to state your feelings. I love beauty, and I love art.
2
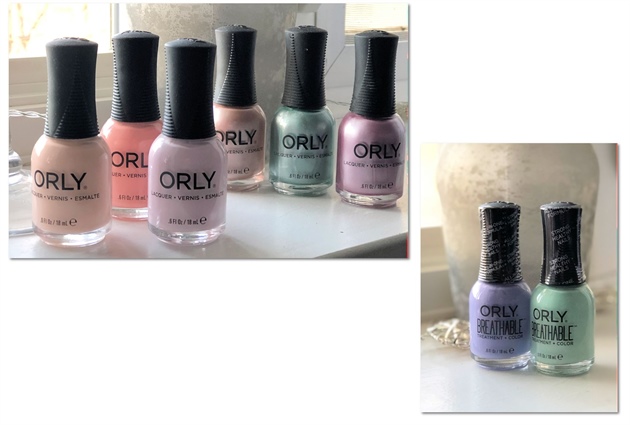
I didn't have a hard time choosing my colors because ORLY graciously sent their new collection to the top 12! I did purchase two more pastel shades from ORLY to complete my look.
3
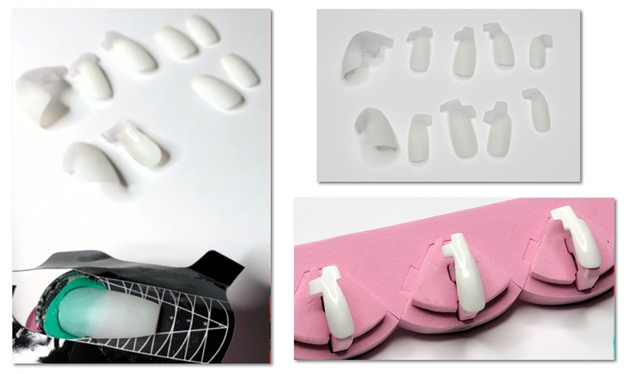
Enhancing Your Nail Tips I wanted something more from my tip than it had to offer, so I created an an acrylic enhancement onto it before I began my design. This is an optional step, as this design can be put onto any shape nail. 1. use a form to create an edgy enhancement onto your tip in the shape of bricks. 2. File the tips to shape, and paint with two coats of ORLY "Pointe Blanche." I recommend top coating the white nails. This will leave a very smooth surface for your detailed painting to come.
4
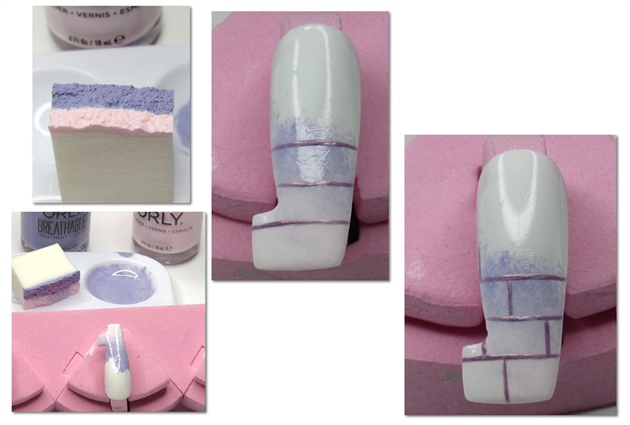
Ombre' Brick Background 1. Use a makeup sponge torn in half to create and ombre' background on the tips. Reload your sponge with color for each nail. Stop the ombre' in a random spot of the nail that is close to the center. 2. Repeat 3. Mix one drop of "Lilac City" and two drops of "Just Breathe" for your brick line work. Create your horizontal lines first, then add in your intersecting vertical lines to create your bricks. While painting your line work using regular polish it is best to wipe your brush with a lint free wipe after every stroke so your lines are clean. You may need to mix fresh polish once or twice more. Do this one all ten nails.
5
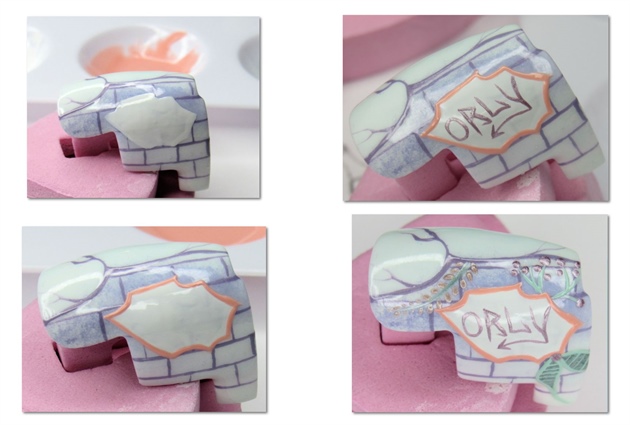
Orly Thumbnail 1 Choose your placement for your white background, and coat it twice using "Pointe Blanche." 2. Outline the white using "Pink Noise." You'll want to double that coat too. 3. Use "Lilac City" to paint ORLY in a street art font. 4. Add in some nature/floral inspired artwork to border your artwork. I used a mix of "Fresh Start" "Electric Jungle" "Metallic Haze" and "Lilac City."
6
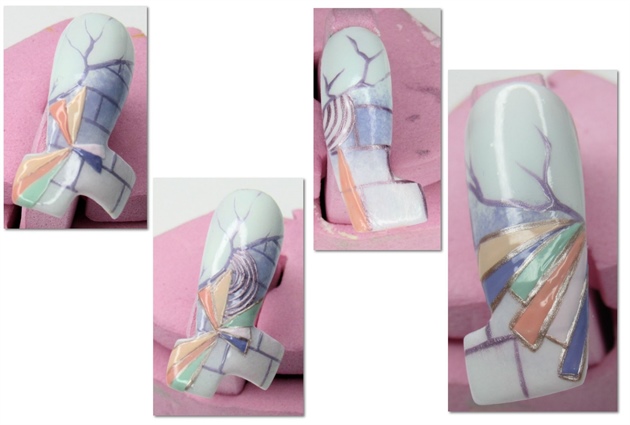
Burst Nails 1. Choose your colors and begin by painting a long triangular shape. Line your triangle first, then fill it with color. 2. Create more triangles next to and opposite the first in various lengths and colors. 3. Using a very light touch, line tour triangles with "Metallic Haze." 4. You may also wish to add more shapes to this design like what is shown in the third image.
7
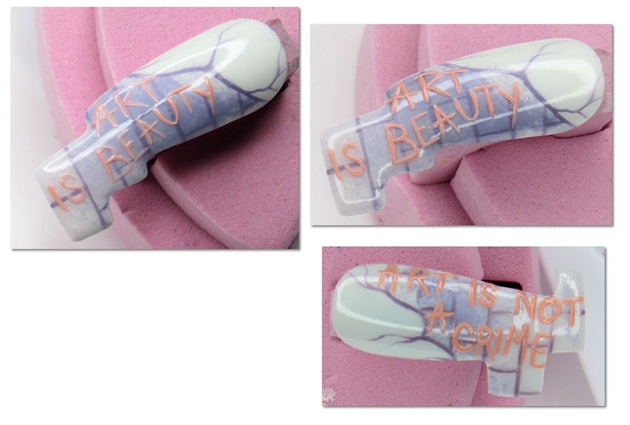
Graffiti Nails 1. Choose your sayings, and paint your first coat of letters using "Pink Noise." 2. Go back over your letters to raise them up and make them pop.
8
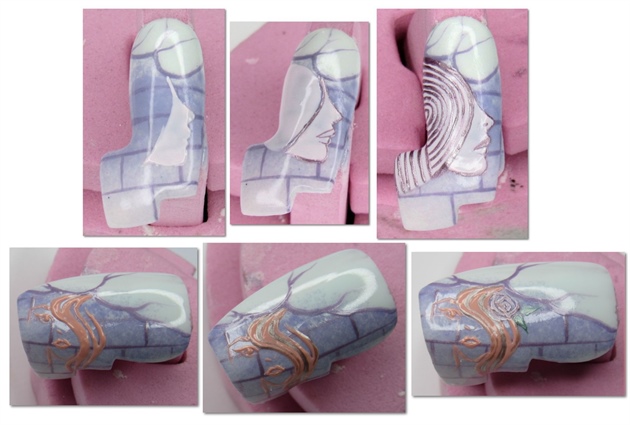
Beauty Nail 1. Top Nail - Create your face sillhouette using "Power Pastel." 2. Use "Lilac City" to add your details. Start with adding the line of the hat that separates it from the face, and the facial features. Once again, wiping your brush after every stroke. 3. Fill in the rest of the details. 4. Bottom Nail - Paint your outlines using "Pink Noise" and fill in the details. Use "Metallic Haze" to highlight the hair, and add a rose using "Lilac City"
9
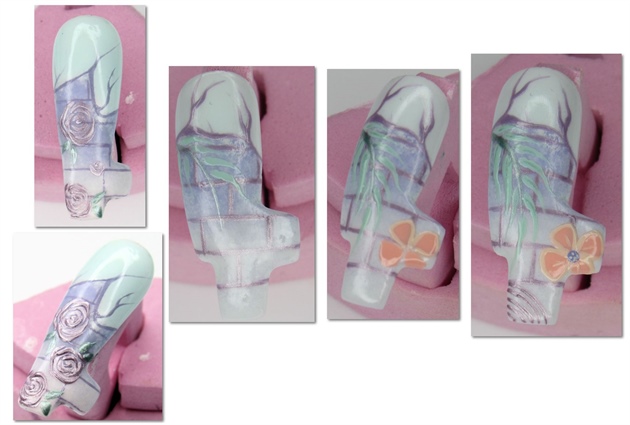
Floral Nails 1. Use "Fresh Start" to begin a palm leaf in the corner. Add deatils using "Electric Jungle." 2. Create a tropical flower with "Pink Noise" and outline in "Cyber Peach." 3. Create roses using "Lilac City. Coat the roses twice to give it a pop.
10
Topcoat the nails a couple times and you're done!
6 Artists like this Photo
Write a Comment
Submit