My 60-70'S rock, Sunset Strip, flower power, themed nails! Our challenge was to create a set inspired by the history of the Sunset Strip. This weeks challene is sponsored by Orly
Step-by-Step Nail Art Tutorial
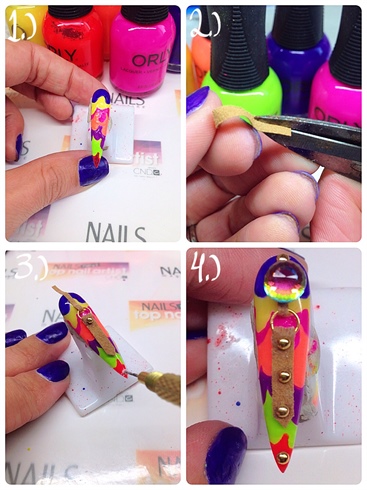
1
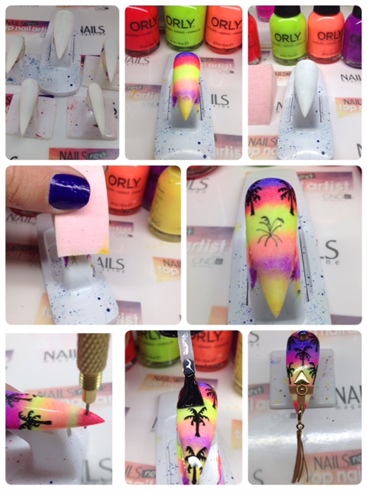
I start by painting all my nails with white gel polish. I then sponge on a varnish ombre. I paint a palm tree pattern with acrylic paint. I then top coat and add my leather removable dangle and other embellishments. \n
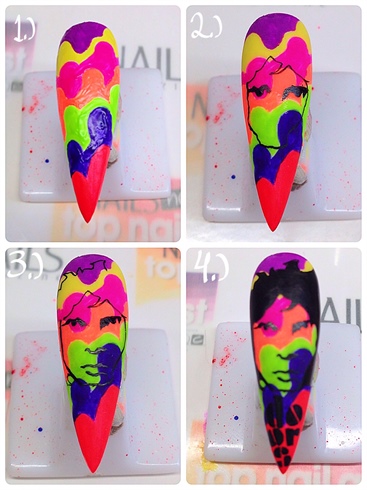
2
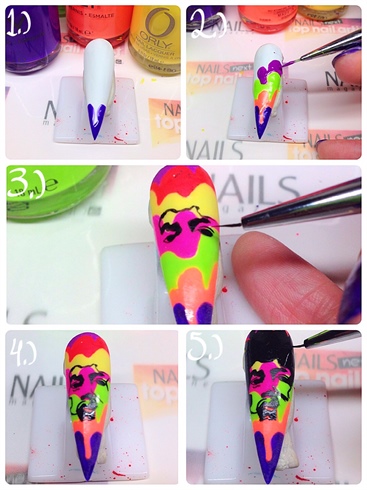
I paint a psychedelic drip background with varnish. I paint Jimi with acrylic paint and then top coat.
3
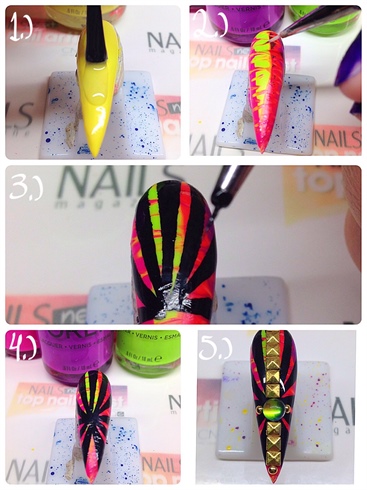
I paint the nail yellow with gel polish. I do a marble design with varnish then I add black lines with acrylic paint. I then top coat and embellish using glue.
4
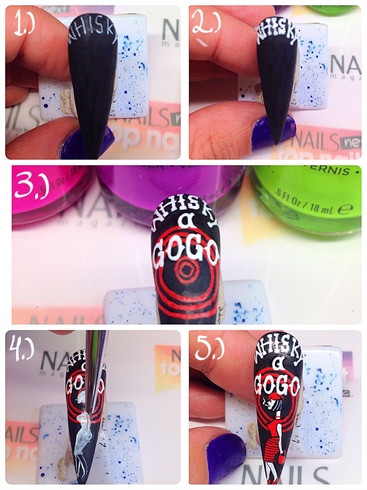
I paint the nail with black gel polish . I buff it then paint the Whisky logo with acrylic paint. I then top coat the nail.
5
I paint the drip design again . I trim some small pieces of leather. I top coat and then glue on the embellishments.
6
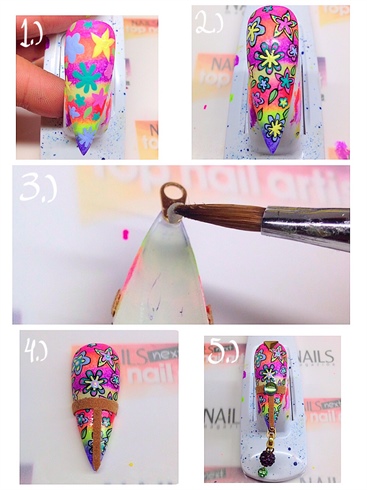
I do another varnish ombre. I paint some flowers with acrylic paint then detail them with black. I add a loop for the removable charm. I top coat and then add my embellishments with glue.
7
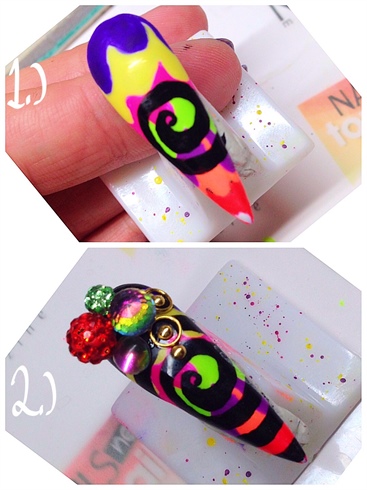
\nI paint the drip design again. then I add a black swirl with acrylic paint. I top coat then add the embellishments with glue.
8
I paint the drip design again then I paint Jim with acrylic paint. I then topcoat the nail.
9
I ombre with varnish then trim out a circle on a form and place it on the nail. I then make an ombre in the circle. I do the same for the blimp. Then I add in some details with acrylic paint. I top coat the nail.\n
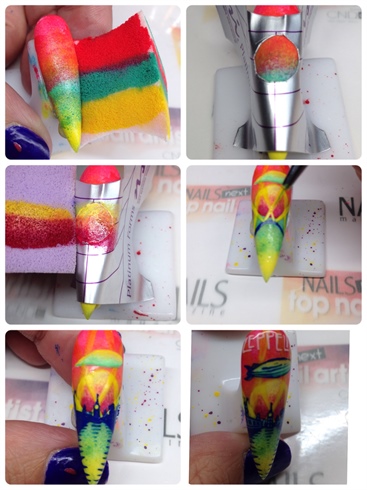
10
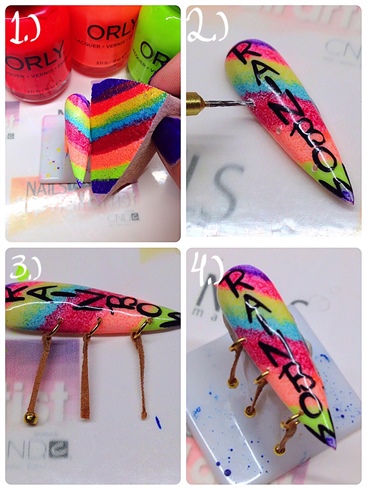
I do another varnish ombre then I paint the rainbow bar text. I top coat the nail then add the piercings and leather embellishments.I top coat then finish the nail.
9 Artists like this Photo
Write a Comment
Submit