This challenge was definitely just that, a challenge! It took me a few days to even decide on a design. Once I figured out if I should go in a traditional style or a artistic style, the rest of the process began to come together.
I knew I wanted to focus on LA fashion. The entire world looks to the privileged people of Los Angeles to show us what's trending. I believe that fashion is a major staple in the LA community. Most people will probably choose Hollywood. But I wanted to go in a different direction. I designed my nails to showcase the fashion capital of the country. Rodeo Drive is everything that is fashion. Its been around for generations, its vintage. Its just as popular today as 20 years ago, which is Trendy. And it is rapidly moving forward. With each season, It is resurfaced, It is Modern. I hope you enjoy my French Manicure style LA Nails.
Step-by-Step Nail Art Tutorial
1
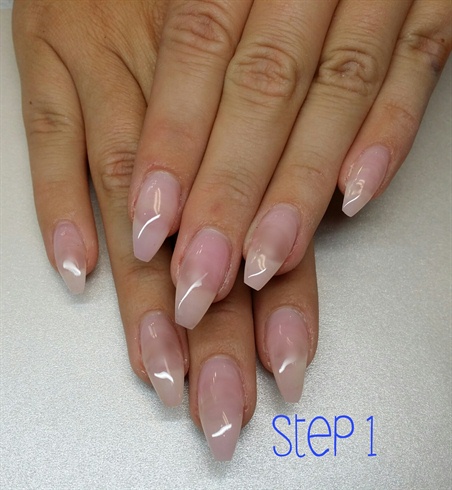
I started with prepped and sealed gel nails. I added a Gel Base Coat and Cured it.
2
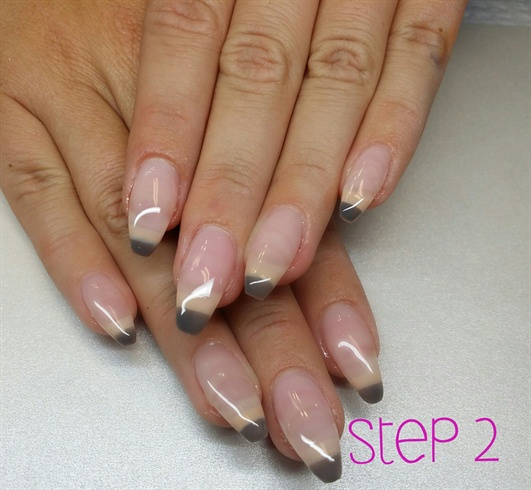
Second, I used tan and gray gel polish to make the foundation for my street and sidewalk. I then cured them.
3
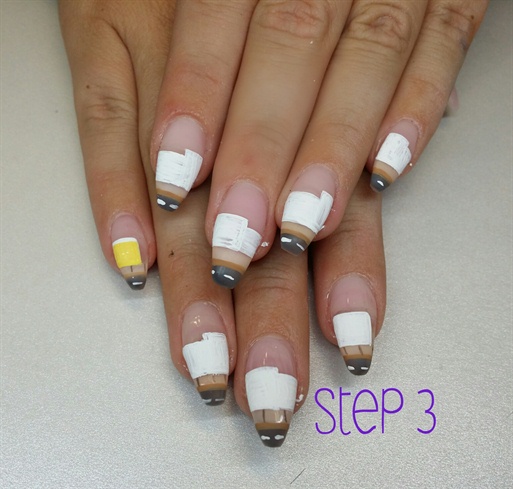
Third, I wiped off the dispersion layer and used white acrylic paint and a really small detail brush to make the bases of my stores and I made the street lines. ( I felt it was important to show the actual street considering my theme was about a road in LA.)
4
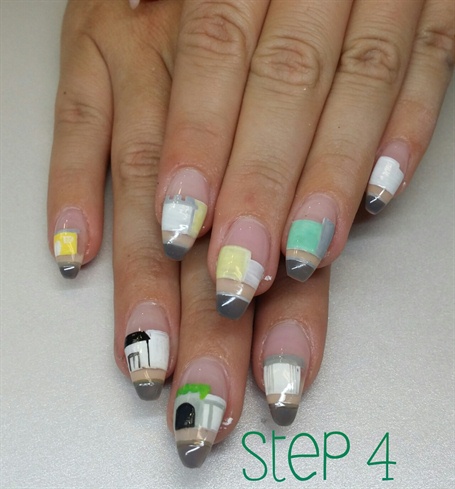
Fourth, I waited for the acrylic paint to dry and I coated them with gel sealer. Next, I began to create my stores by adding colors and details to the buildings.
5
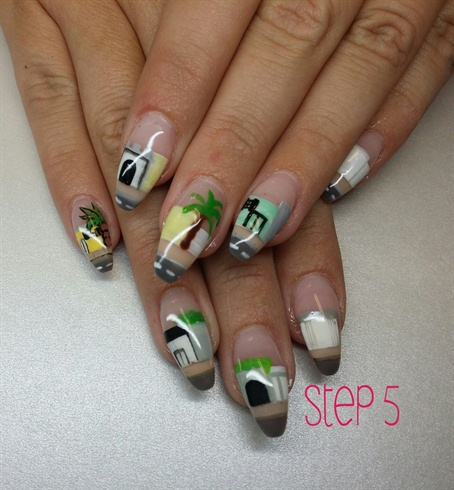
Next, I continued to add color to my buildings and I painted in some greenery with gel polish. and cured it all.
6

After wiping off the dispersion layer. I began to add some finer details with a .001 brush and acrylic paint. Like store names located on Rodeo Drive. Such as, Louis Vuitton and YSL.
7
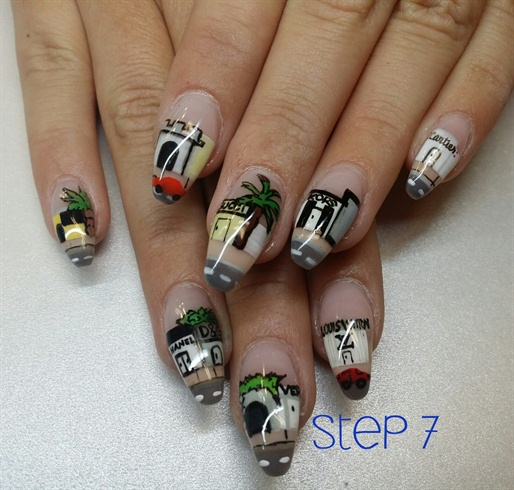
I continued to add detail with my tiny brush and black acrylic paint. I felt as though the landscaping made a big impact of the atmosphere on Rodeo Drive. That is why I had to add some depth by layering on some palm trees in the foThis is the evolution of the first thumb nail. I wanted to reiterate the location of the design, being In Los Angeles and also, show the famous landmark Rodeo Drive street sign. I painted on the black base with black gel polish and a detailing brush. I cured it, the wiped the dispersion layer. Next I added some gold details around the perimeter of the sign with gold acrylic paint and a striper brush. Lastly, I used gel polish to create the colorful tree in the foreground and I used black acrylic paint to add some trees in the background.\nre ground, and soon in the background.
8
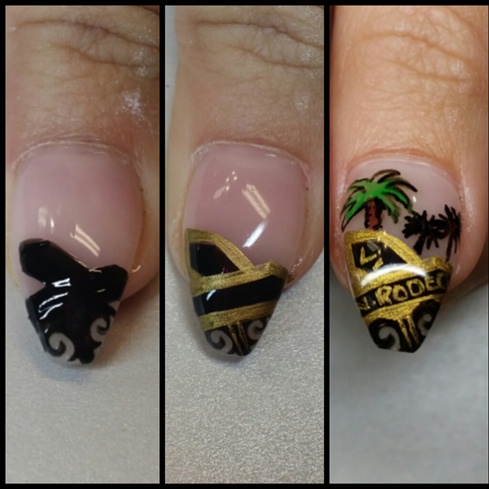
This is the evolution of the first thumb nail. I wanted to reiterate the location of the design, being In Los Angeles and also, show the famous landmark Rodeo Drive street sign. I painted on the black base with black gel polish and a detailing brush. I cured it, the wiped the dispersion layer. Next I added some gold details around the perimeter of the sign with gold acrylic paint and a striper brush. Lastly, I used gel polish to create the colorful tree in the foreground and I used black acrylic paint to add some trees in the background.
9
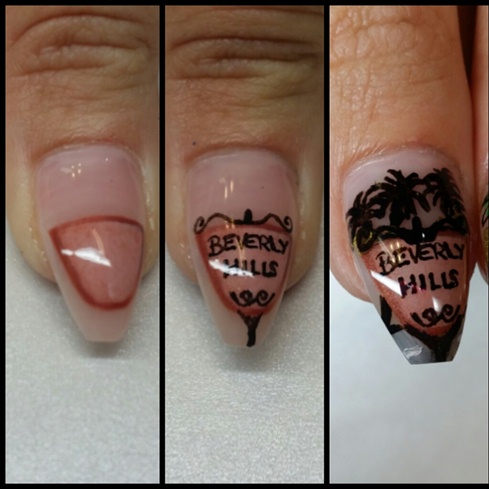
For my second thumb nail I chose to show a Beverly Hills road sign. Including another landmark LA. To create it I used gel polish to make a tan base, I cured it and then outlined it in a bronze gel polish. When that was also cured I wiped the dispersion layer and added wording and fine details with a tiny brush and acrylic paint.
10
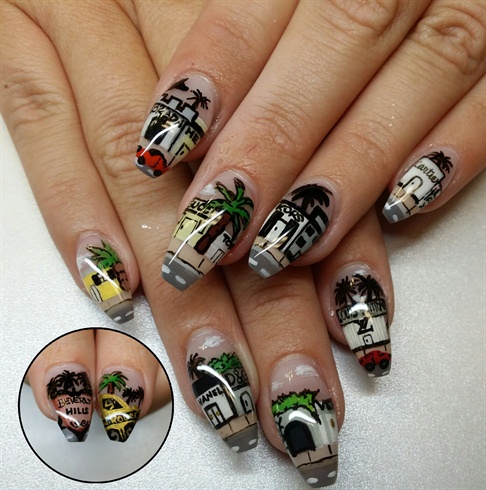
Here is my finished design. I added two sports cars because in every picture I came across of Rodeo Drive had brightly colored custom cars parked up and down the street. I also added some clouds above my design, a jet way up high and a sign leading to LAX international airport all with acrylic paint. Lastly I used Orly's Gel FX Top Coat to seal and protect my creation. I hope you enjoyed my interpretation of this challenge. I want to thank the judges and ORLY, this was really fun! And I hope I did the city of LA justice :)
12 Artists like this Photo
Write a Comment
Submit