For our week 9 challenge, this weeks sponsor Super Nail, asked us to create 10 comic strip themed nails. We were asked to use gel polish, colored acrylic, and glitter. Also, we were asked to show hand painting, as well as 3d. And to use one non-nail tool to create our look.
After some major thinking, I decided to go with an underlying boy verses girl theme. I've had plenty to relate to in that department lately. So I researched many male and female heroes and villains. I paid close attention to the story lines and tried to find one that I could relate to. I finally came across the lengthy power struggle between a sassy red headed, vine shooting villain, and a stern, emotionless hero. How perfect :)
I focused on Poison Ivy's relationship with her love, Batman. Although, he says he cares for her, he never takes her seriously because of her villainess past. And no matter how many times Batman betrays her, or dismisses her love for him, she is still in complete love with him. But today.... She's standing up for herself and getting revenge for all the hurtful things he has done to her throughout the decades.
I hope you enjoy my entry and tutorial. Thank you for hosting such an awesome challenge Super Nail! Thank you to all the Judges!
Step-by-Step Nail Art Tutorial
1
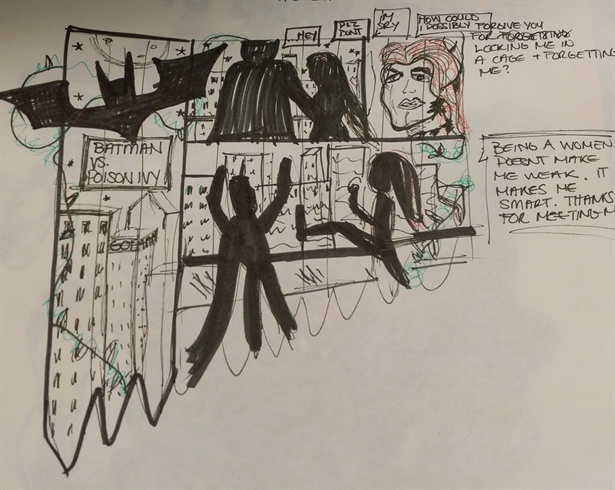
Once I decided on my characters, I sketched up a rough draft. I created the basic story line, and let my piece evolve from there.
2
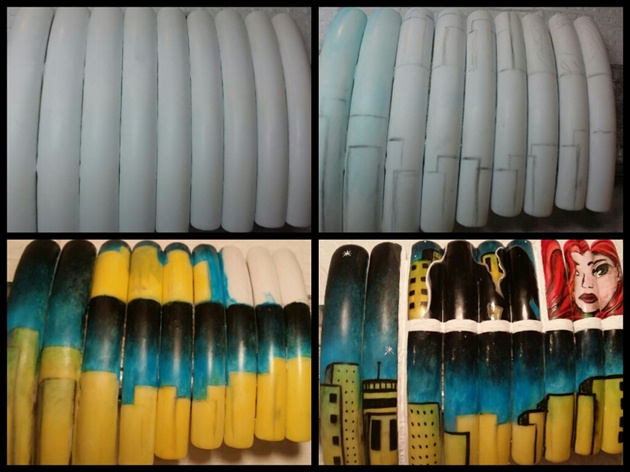
1. I used a few unusaual tools for this challenge. The first one was an industrial strength tape that I used to adhere all the tips to a piece of metal. This made it super easy to handle them. I could easily take them on and off my surface with out ruining them with glue.\n I painted all ten tips with gel base, two coats of white gel polish, and a matte gel top coat.\n2. Next, I used a pencil and a ruler to map out the basic design of my hand painted background.\n3. I used gel art paints to begin coloring in my background. I also used a baby tooth brush to blend the colors in my night sky. I used several thin layers and cured it in between.\n3. After finishing my background, I used gel play to create my characters in the second and third frame of my comic strip. I also used Manga pens for my detailing. They are markers that are specially made to create Japanese style comics.
3
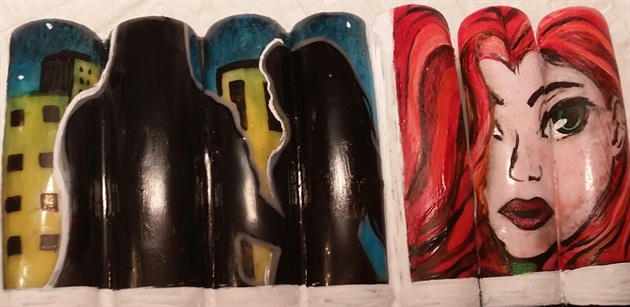
Here is a closer look at the silhouettes of Batman and Poison Ivy. He follows her and when she notices him he reaches for her, pulls her close, and tries to get her to forget about why she is mad. She is in disguised and asks him, "How could you?". \nIn the next frame, she begins to cry and as her emotions escalate, her trademark Ivy begins to flare. Your not supposed to mess with a women whose heart is broken.
4
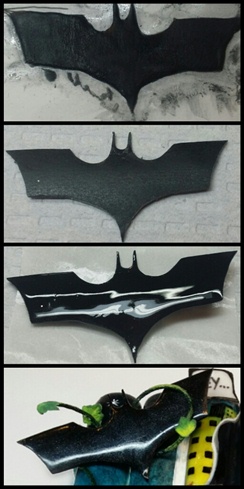
To create my Batman logo for my title page I used color acrylic. I drew out the symbol on wax paper, and sculpted on top of it with acrylic. When it dried I peeled it off the wax paper and used my efile to smooth and perfect it. Next I top coated it with gel and patter on fine black glitter to give it some dimension. I eventually wanted to logo to appear to be taken over by Poison Ivy's vines.
5
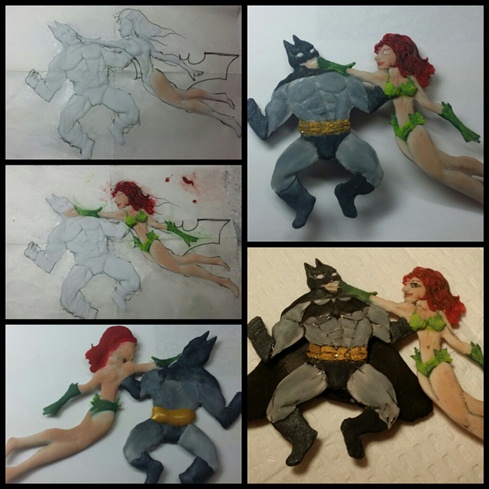
I created my characters in steps. I used a piece of wax paper and sketched out the dueling figures. Next I used white acrylic to build up the front of their bodies. I wanted to have lots of details in my muscles and clothing. When the bodies we sculpted, I used colored acrylic to enhance and shade the piece. I sculpted a bunch of ivy leaves on a arabella form, and one by one attached them to Poison Ivys outfit. I also used a gold glitter and mixed it with a gold pigment to give Batmans belt a little sparkle. When the front of the characters were complete, I tured them over and used the same methods on the backside. These characters are 100% sculptured, no clay and no foil on the inside. After I was done sculpting the characters, I went in with a little gel play to create the finer detailing. Batmans cape was created the same way my quotation bubbles were. I used a bead of colored acrylic, and flattened it between two pieces of wax paper. Then after is set, but when it was still pliable, I molded it into the positioning I wanted.
6
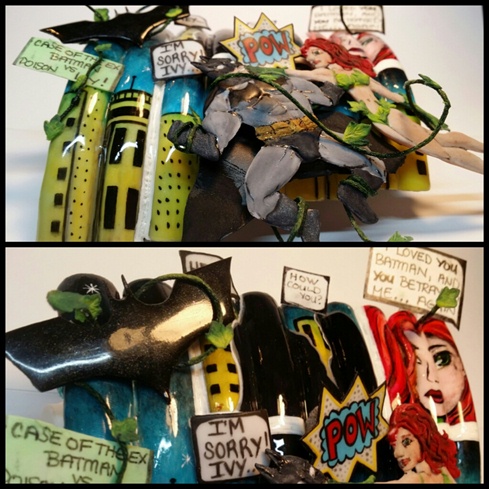
I used embroidery thread, and coated it in a thin hard gel and cured it. It was stiff enough to hold some height, but plyable enough to let me wrap it around things. I used small beads of acrylic to attach my hand sculpted ivy leaves.
7
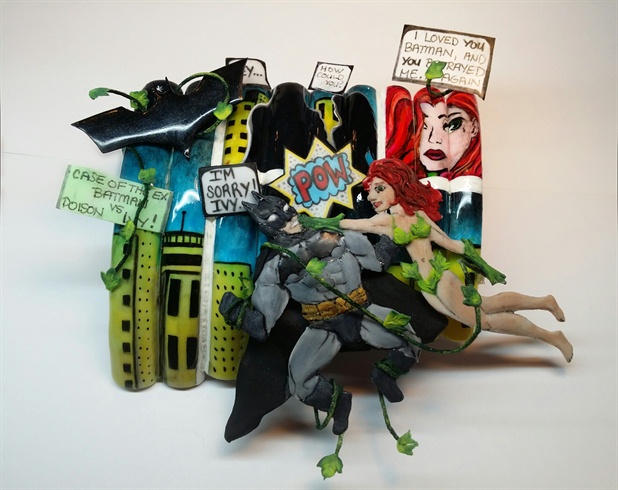
Here is my finished product! I hope you like it! Thank you again to everyone who takes the time to read this!
3 Artists like this Photo
Write a Comment
Submit