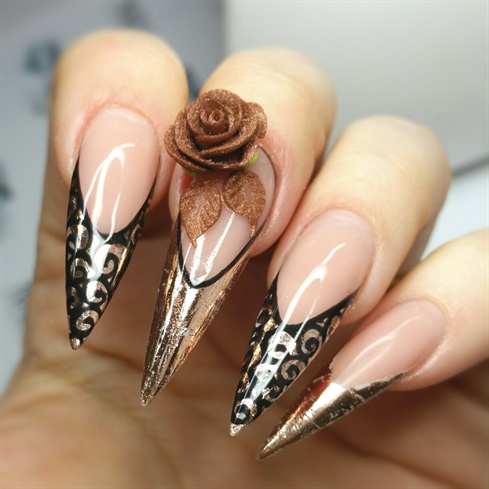
NTNA Challenge #3 Couture Embellished


Advertisement

Most Popular Nail Art Of The Week

Browse

Advertisement

Embed This Step-by-Step Nail Art Tutorial


Copy and paste the embed code above to put this step-by-step nail art tutorial on your web site.

Advertisement
Posted on September 20, 2015
|  
Like
4240 views  |   8 comments  |   Likes 61  

In the second part of this challenge we were asked to rework the French Nails into a Haute Couture Masterpiece.
Haute couture to me means High Fashion, one of a kind design. I wanted them to have a very luxurious feel, which is why I chose the bronze and rose gold color palette.
My inspiration came from images of European haute couture dresses. I embellished the nails with rose gold foil, swarovskis and studs, a bronze acrylic rose and some black acrylic ruffles.
I really enjoyed making these nails, and I actually found it hard to take my eyes off them!

Step-by-Step Nail Art Tutorial

1
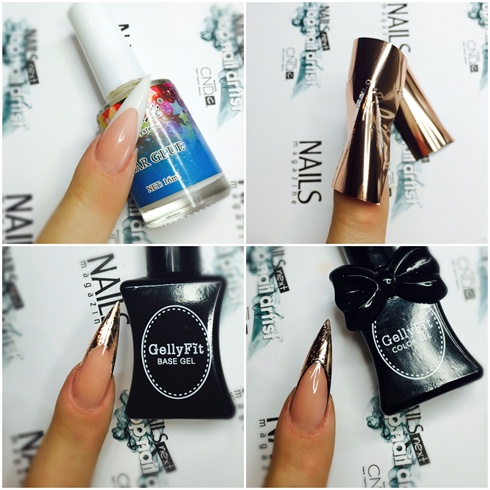
Here I covered the white acrylic with foil glue. I then used rose gold foil. I used black gel polish to define the smile line.

Here I covered the white acrylic with foil glue. I then used rose gold foil. I used black gel polish to define the smile line.  

2
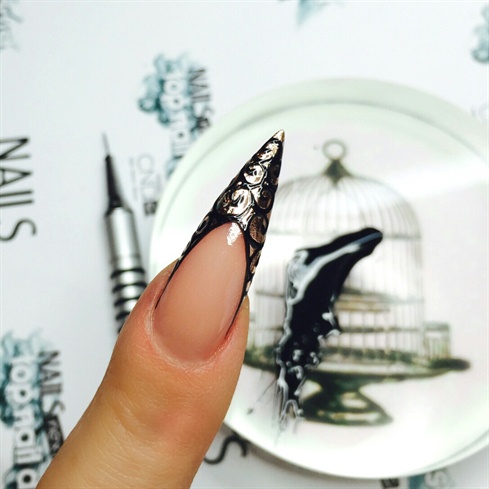
Filling in more swirl design with black gel polish.

Filling in more swirl design with black gel polish.  

3
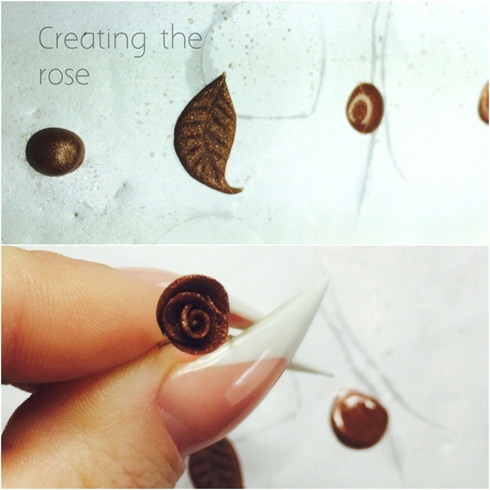
This is how I made my rose. I made the leaves directly onto the nail, but practised on the form paper first.

This is how I made my rose. I made the leaves directly onto the nail, but practised on the form paper first.  

4
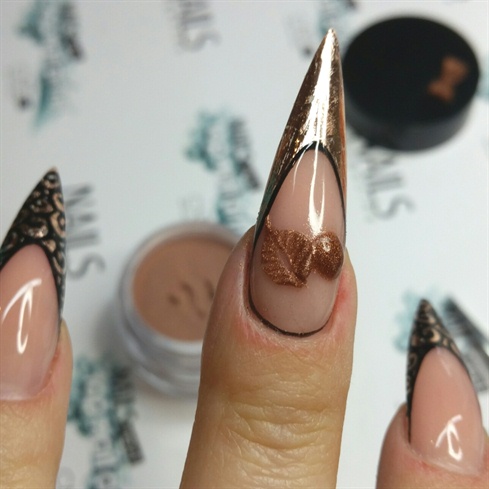
Building the leaves.

Building the leaves.  

5
I affixed the rose with putty, to make sure I put it in the right position.

I affixed the rose with putty, to make sure I put it in the right position.  

6
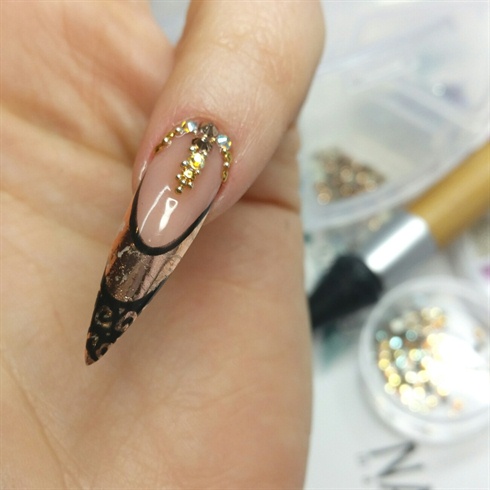
I used Swarovski Crystals to Embellish my work. I attached the crystals with Akzentz Bling on, so I had time to get the placement perfect.

I used Swarovski Crystals to Embellish my work. I attached the crystals with Akzentz Bling on, so I had time to get the placement perfect.  

7
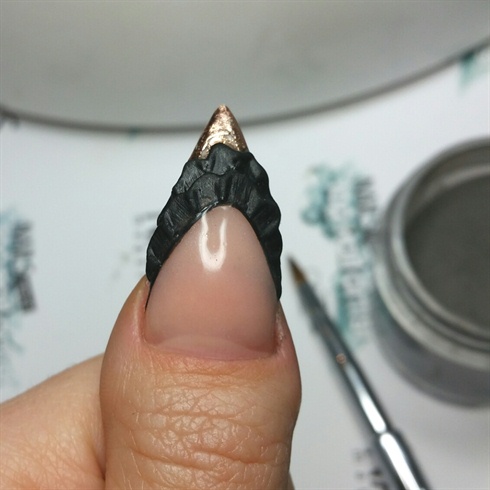
Here I added black ruffles to my thumb nail.

Here I added black ruffles to my thumb nail.  

8
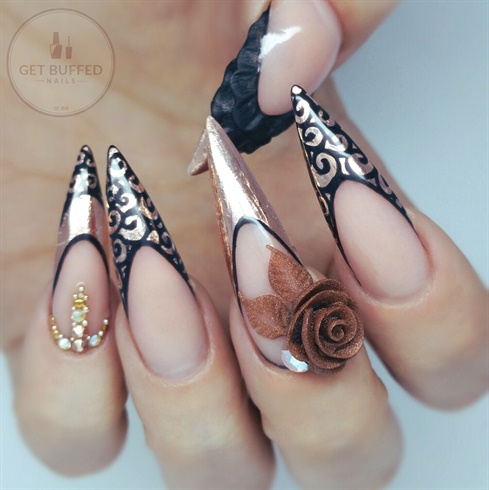
At first I finished my design like this.

At first I finished my design like this.  

9
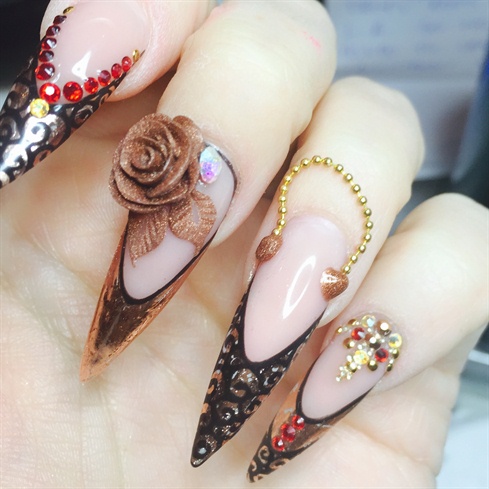
But then I decided to add more embellishment with the ball chain and more Swarovski.

But then I decided to add more embellishment with the ball chain and more Swarovski.  

10
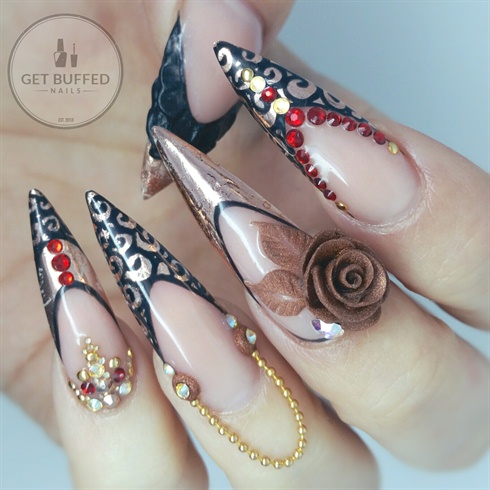
And here is the finished look.

And here is the finished look.  

 
   Tags
Mixed Media     swarovski crystals     bling     haute couture     entity     ntna

8 Comments

Report as Inappropriate
Reply
nailbarLoungePRO - Commented 8 years ago
Im not allowed to click the Like button but thats okay... I Love It!! OxO
Report as Inappropriate
Reply
getbuffednails - Commented 8 years ago
Thanks Vic xx
Report as Inappropriate
Reply
PuppyPufferNerd - Commented 8 years ago
They look amazing!!! Is that rose clay? πŸ‘πŸΎπŸ‘πŸΎπŸ‘πŸΎπŸ‘πŸΎπŸ’…πŸΎπŸ’…πŸΎπŸ’…πŸΎ
Report as Inappropriate
Reply
getbuffednails - Commented 8 years ago
Thank you :-) No I made it with a bronze coloured acrylic.
Report as Inappropriate
Reply
charnell - Commented 8 years ago
Love! πŸ˜€ actually LOVE 😍
Report as Inappropriate
Reply
abi_rollinson24 - Commented 8 years ago
Gorgeous!
Report as Inappropriate
Reply
Kimistrybaby - Commented 8 years ago
Just breathtaking
Report as Inappropriate
Reply
LadyBromley - Commented 5 years ago
Absolutely Stunning 😍😍😍

Write a Comment


Submit
Please sign in or register to     Close
Loading...

No
Yes
FEEDBACK