As artists, we are all a bit mysterious. As nail artists, we are extra mysterious when it comes to the skills and techniques we have hidden up our sleeves. With this in mind, inspiration was drawn from a Venetian Carnival celebration, where everyone covers their faces with elaborate and elegant masks to keep their identity a mystery.
Step-by-Step Nail Art Tutorial
1
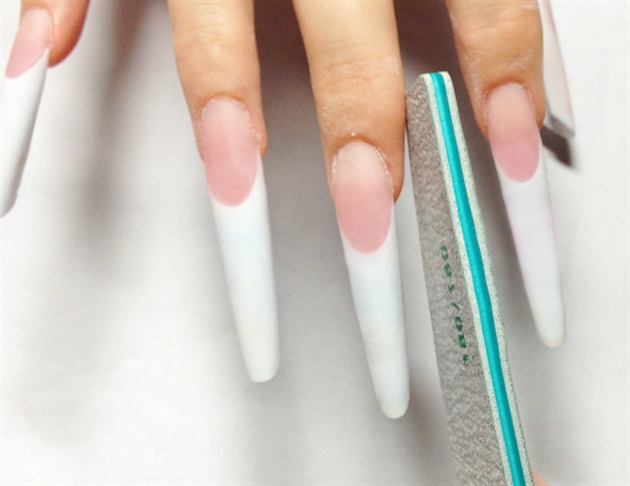
Sculpt French Pipe shaped nails with Acrylic. Pipe Shape is pointy in shape, but keeps the deeps C curve like Square nails. File the free edge of the nail at a 45 degree angle for a pointy view from above.
2

Apply chunky gold glitter gel on the thumb and ring finger. After curing, place gold foil leaf over the sticky gel. The chunky glitter leaves a textured, semi 3D, feel and appearance.
3
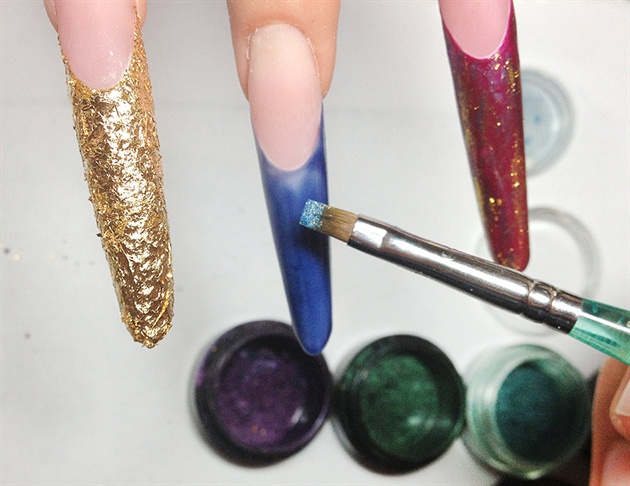
Apply royal blue, emerald green, and deep magenta on the pinkie, middle, and pointer finger, respectfully. Use mica powder, like eye make up, to lightly dust the sticky gel after being cured. Finish off with a gold mica powder to complete the silky fabric effect.
4
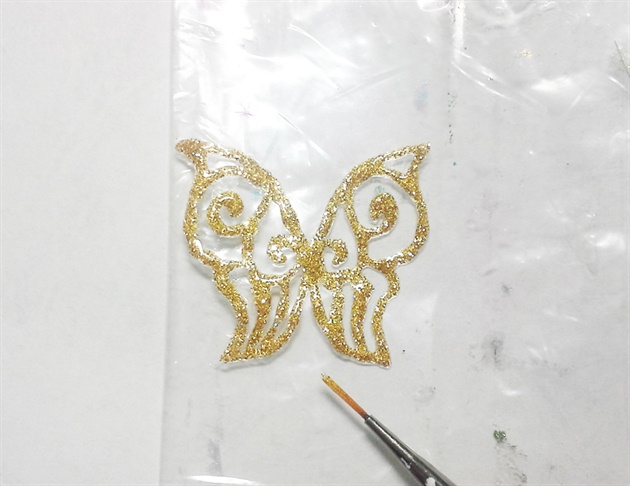
On a piece of plastic, paint a butterfly with gold glitter gel and cure. Apply a layer of hard gel over the gold gel. When curing, gently fold the butterfly wings up.
5
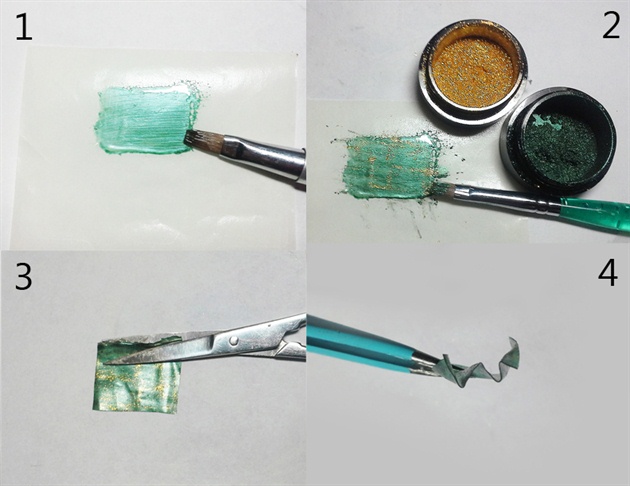
Create a flexible gel sheet by applying a rectangle of color gel on wax paper and cure. Brush mica powders and finish with a thin layer of a flexible clear gel. After curing, cut the gel sheet into a rectangle. Fold the rectangle gel sheet to create a fan pattern. Make two more gel sheets, one for the flowers, and the other for the ribbons.
6
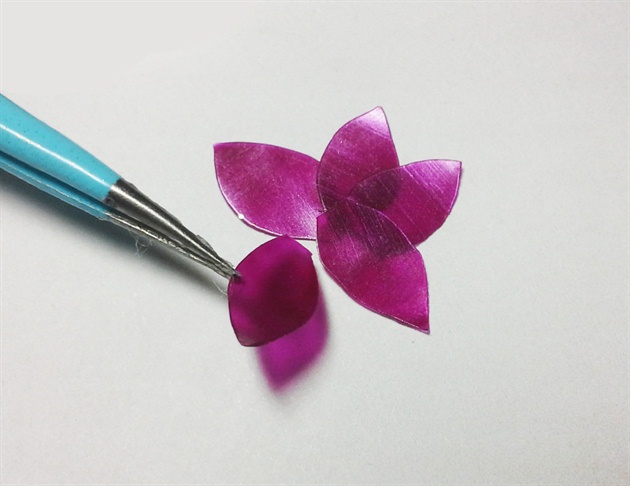
Cut the flower gel sheet into petals, and arrange them into a flower. Apply hard gel to the center of the flower and cure.
7
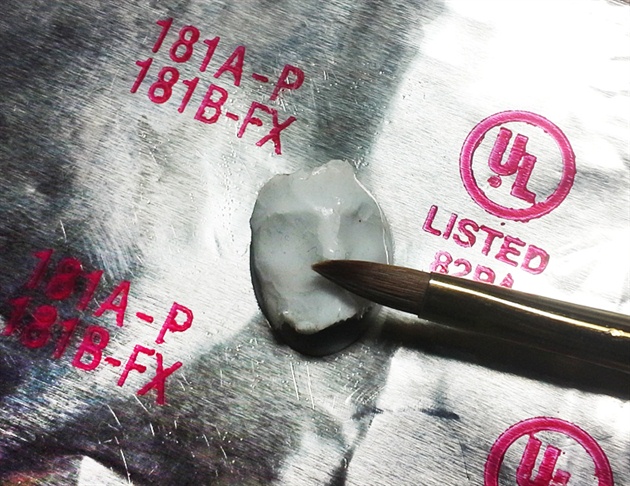
On a piece of foil sculpt a face with white acrylic.
8
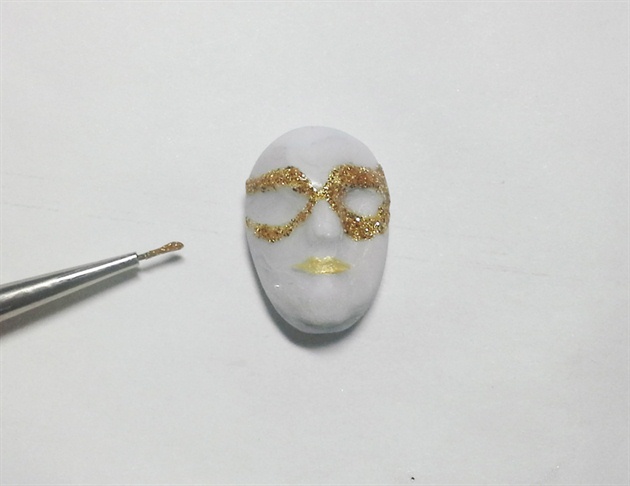
Decorate the face with gel, paint and embellishments.
9
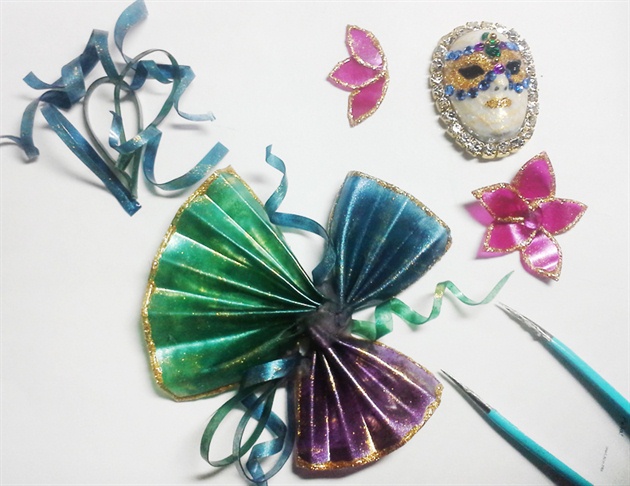
Arrange and attach gel fans and ribbons with acrylic. Then attach the mask and flowers with acrylic.
10
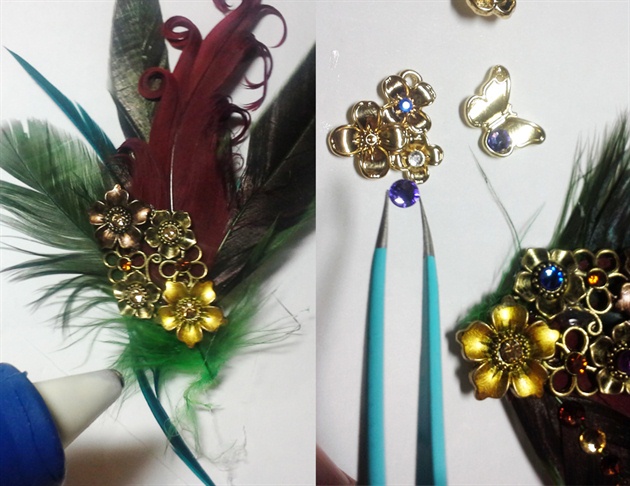
The hand piece was created with feathers, a broach and charms. Gold chain attached to the mask and the pinkie nail connects the hand piece to the nails and serves as a hand decoration. Charms are attached to a gold chain connected to the butterfly.
7 Artists like this Photo
Write a Comment
Submit