Witches and witchcraft is one of my favourite topic/genres. Since a young age I have always had a fascination with all things Wiccan and occult so this challenge spoke to my heart! Add in halloween and the fact I’m an all time horror movie lover! and its a challenge to be excited over. I actually had a hard time choosing my witch for my inspiration, I knew I wanted to stay away from anything Disney or classic and started pulling from some of my favourite books and movies. I had originally wanted to do something based on a type of witch using for eg elemental magic, then swung back to witches like Morgan le Fay, I’m also a lover of fantasy and to me the fantasy witch has so much creative material to source inspiration from. Another spin on the witch was looking at the sorceress type of witch ie like the enchantress from suicide squad. In the end I’ve pulled my inspiration from a very favourite tv series American horror story basing my set on the season coven. The coven has a very strong character and a fantastic story line. So I’ve pulled a lot of my favourite elements and parts from the characters from their skill sets to types of magic to characters ect to put my piece together we have a mix of witch and voodoo magic and my version of the minotaur, the lover of Marie Laveau in the series. I’ve use a mix of pigments, painting gels, acrylic and different techniques of 3d to pull it all into a visual story and used my crystals to enhance my design working them into my work rather than just placing on a finished design. My favourite piece is the voodoo doll using the amazing skulls we got in our packs.
Step-by-Step Nail Art Tutorial
1
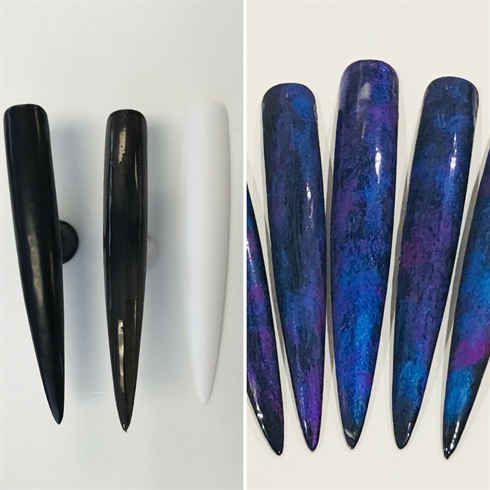
Base coat nails in black gel paint. Using Blue and purple pigment press into the tacky layer. I use a brush with some alcohol on to blend and distress pigments out. Top coat
2

Using a bit of cling film, I lay over my tips. This allows me to build and adjust. As I know its going to be built up I Like to work on my tips without the weight and bulk of my 3d element. I wait in between stages and use my acrylic with minimal liquid to build height and shape.
3
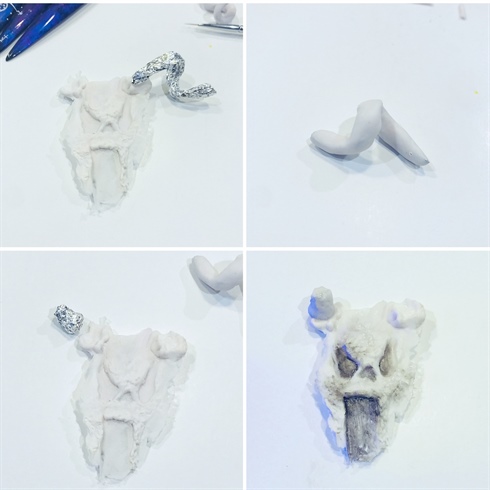
Using tin foil I twist and shape my horns, check size and cover in white acrylic. At this point I Use some black acrylic paint to start shading my piece. I also re think and add additional height and bulk to my minotaur's head.
4
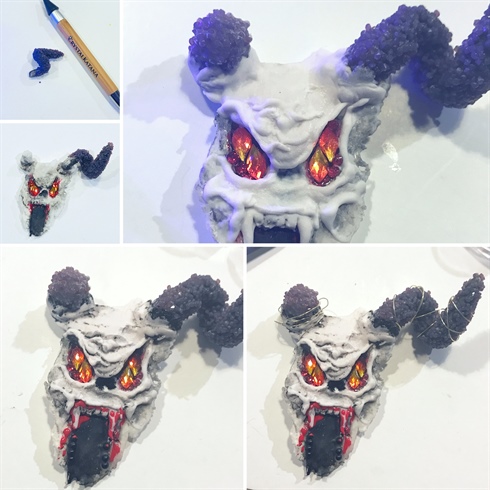
Ive used the end of my 3d brush to create texture when the acrylic is 50/50 dry. For the horns I've painted them in black gel and attached the purple crystal pixie with matte top coat. Horns are attached with clear acrylic, and I build up with white around the base. Ive used a mix of the crystals for his eyes, used black to shade areas. And added some black balls and red gel paint for detailing. Ive used fine picture hanging wire for around the horns.
5
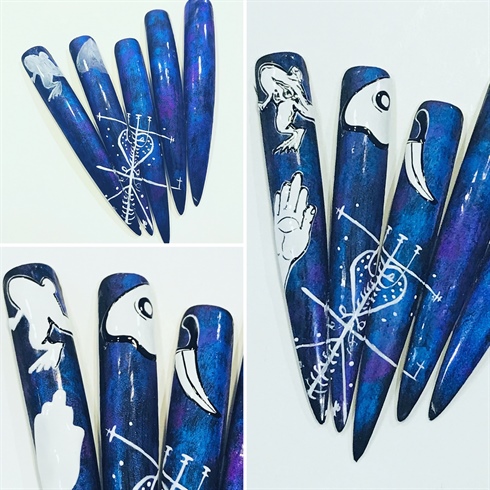
Using white gel paint I lay out my design and cure. Once happy I come back in with a fine liner and black gel paint to detail. Once happy I've used a matt top coat.
6
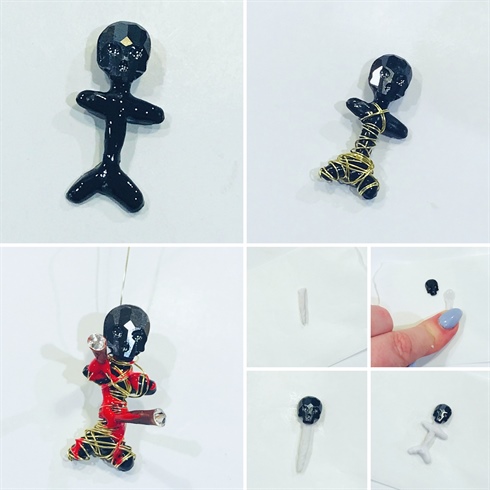
I couldnt not use the skull we got so there is a heavy voodoo theme in coven, so I decided to make a little voodoo doll. I started with a bit of acrylic and shaped into a stick, used clear acrylic to attach skull to the body. He is laid out on a form roll and arms and legs added. Painted in black gel paint, wrapped in picture wire for effect and the sticks are made from toothpicks painted in gel and crystals for the top. Additional red gel paint added. The wire is attached around neck like a noose and for attachment purposes.
7
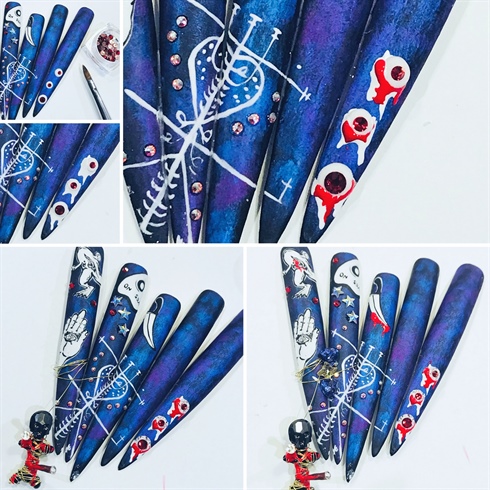
There is so many great eyeball moments in coven, I had to include, these are white acrylic with red crystals for pupils and white and red gel paint for detailing. At this point I add in all my additional crystals, I wanted to add into the design opposed to just using the crystals. Any additional hand painted features are added and the voodoo doll attached.
8
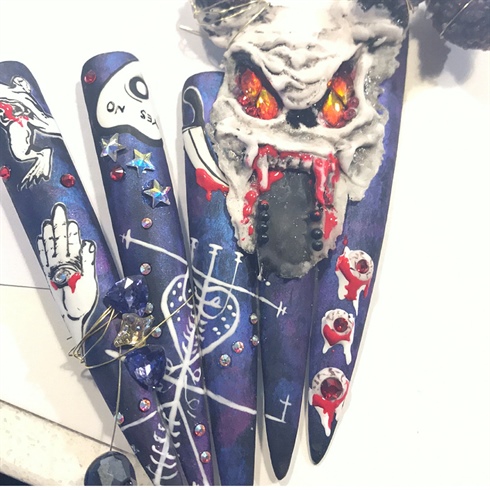
At this point the minotaur skull is attached using acrylic . Now I originally wanted to add a snake as in the series and cover art, however it didnt work so I sat at this stage for a few days.
9
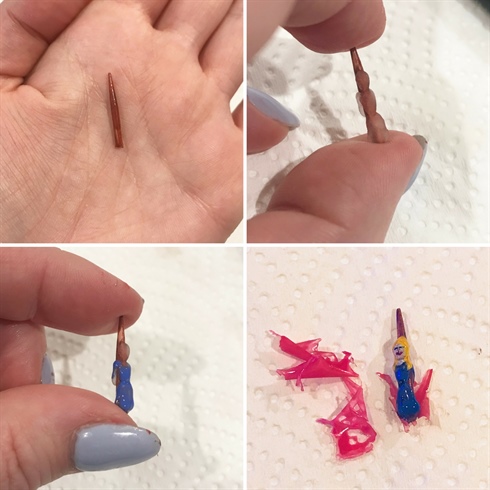
I ended up replacing the snake with misty on the stake, misty has a pretty cool gift of resurgence. So I used a tip of toothpick and painted with gel. Clear acrylic to build her body, gel paint to paint. The red flames are left over gel iI cured and rolled and attached with gel.
10
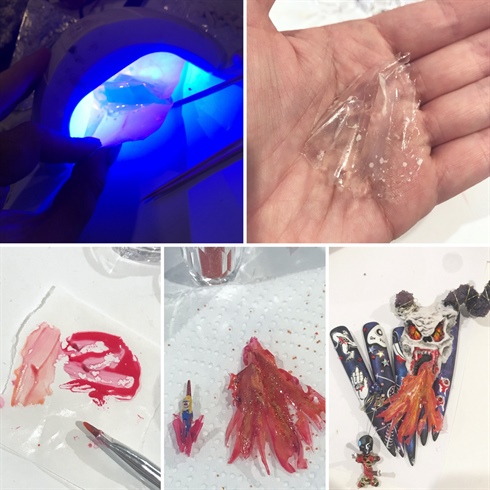
The flame I didnt want solid. I used clear gel polish base on a form paper and semi cured 5 secs the shaped the form. I roughly shaped the edges and trimmed where needed. I mixed red, yellow and orange gel into some matte top coat to thin out and painted flame effects. Attached with some clear acrylic and then added in the amazing orange crystal pixie we got and attached my little misty in and thats how I put together my piece. I hope you enjoy my AHS inspired set of nails
7 Artists like this Photo
Write a Comment
Submit