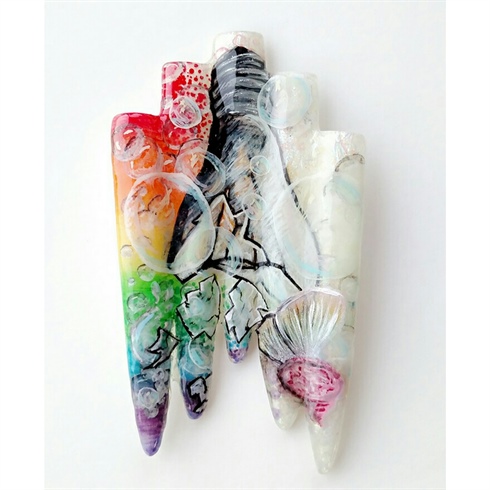
Outside of the box or "playing" outside of the box for me comes naturally as I enjoy fantastical, whimsical and supernatural beauty. The light bulb is a representation of my ideas, and in this instance I have chosen to showcase the light bulb as a cocoon. My personality is so bubbly and outgoing, that bubbles were a must for me in this task. The bubbles represent my imagination effervescing through the cocoon, anxious to be set free. My brain emerges like a butterfly transfigured from my idea filled imagination.
Step-by-Step Nail Art Tutorial
1
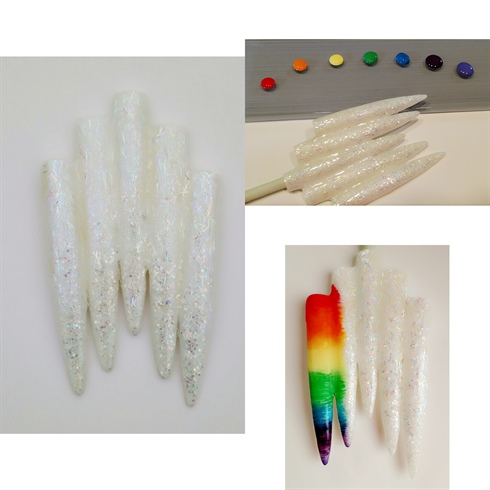
I prepared the nails for gel polish by buffing them and then adhering them together. I used a pearl white gel polish as my base coat and then layered three different iridescent glitter gel polishes to add depth. After these were cured i started my palette of colors. ROY G BIV or red, orange, yellow, green, blue, indigo and violet. I used a fan brush and carefully blended the colors until I achieved the rainbow effect on the first nail.
2
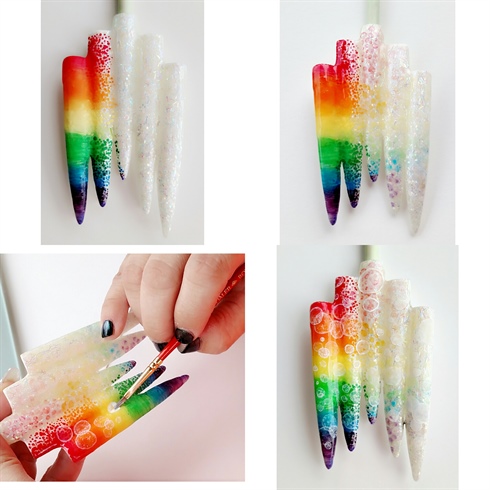
I made sure my initial rainbow was blended well and continued onto the second nail using a dotting tool to achieve the same rainbow effect. i did this so the rainbow appeared to be floating away. I varied the size of the dots to give it more dimension. Once i was satisfied with this technique I moved onto the last two nails that would have the rainbow on them. I thinned down my paint significantly with water and placed small beads of paint one at a time on the third nail. i allowed it to settle for a few seconds, I removed excess pain and water from my brush and slowly placed the tip of my brush onto the bead, allowing the bristles to soak up the paint. This techniques left behind a subtle hint of color. i did this with each color. The fourth nail was done this same way, only the paint was significantly watered down for an even more translucent effect. Once i was satisfied with my background I top coated with gel and moved onto the next step by adding bubbles. I did these with watered down white paint and removed the excess, leaving behind a shear circle.
3
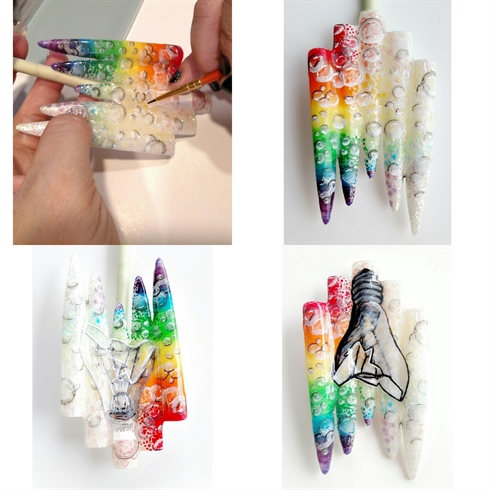
After my bubbles were dry I added highlights and dimension with thinned down black paint. I wanted them to really look as if they were really floating away. After each step I top coated with gel as to not upset the initial layer before it. Once i was satisfied with my bubble placement, I began my lightbulb. I kept my paint as sheer as I possibly could to give it that feel that you could see through it. I made sure that the shadowed side was the side of the rainbow. Almost as if the rainbow is shadowing the bulb. I kept highlighting and shading until I achieved the look i wanted for my broken lightbulb.
4
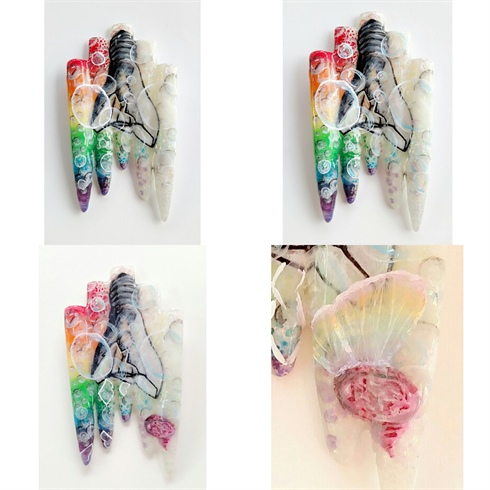
Once i was done with the lightbulb, I added more bubbles and made them to look as if they were escaping the bulb. I continued to add dimension to the bubbles by adding pastel shades of the rainbow onto the edges of the bubbles to give them depth. After my bubbles were complete, I painted my brain as it was emerging from the bulb as if it were a cocoon. I made the wings very translucent and added a rainbow sheen to show that the "brain butterfly" was actually flying away from the rainbow. Once I was finished with my butterfly I top coated with gel and then added a holographic nail polish top coat over the wings of my brainfly.
6
Final look.
14 Artists like this Photo
Write a Comment
Submit