NTNA top 3: Manus x Machina (Sponsored by CND) Part Three
We were asked to create a set inspired by flowers in fashion. We had to include hand and machine made elements and the set was to be made on 10 individual nail tips.
I love the contrast of different colors on top of a white or black background on fabrics, so I got to continue on my color theme from the previous challenges (Folded nails, Fifty shades of lace).
I used machine made artificial flowers on my set for the Machina part of the set and hand made everything else. I painted flowers inspired by the designs of Ted Baker. I made similar flowers using acrylics and brought the set together with the artificial flowers.
Step-by-Step Nail Art Tutorial
1
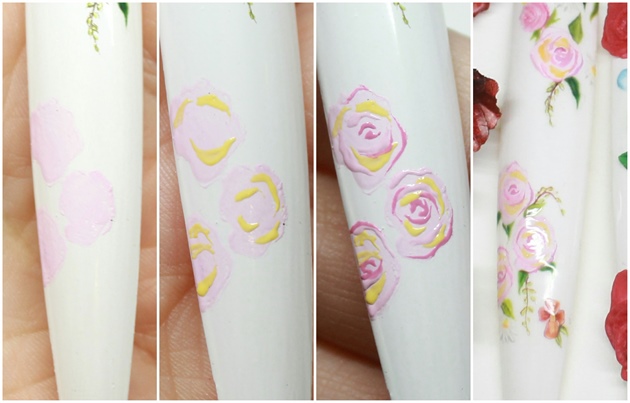
First I painted the nail white using the CND Shellac Cream Puff gel polish. Then I painted the light pink shade for the base of the flowers. I painted yellow highlights and then the shadows using gel paints.
2
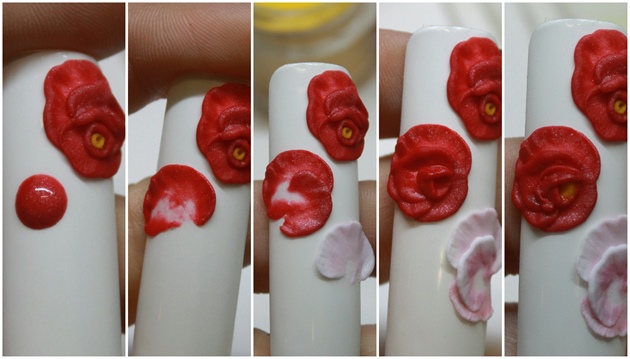
The set was screaming for 3D flowers, so I made them using acrylics. First I took a bead of acrylic and let it dry a bit. Then using a small acrylic brush I spread the bead to create a petal. Add a second bead on top of the other and make another petal of it. Create the bud from another acrylic bead. Place the bead on the flower and let it dry for a moment. Then poke the bead with your brush to create a hole. Fill the hole with yellow acrylic and poke the acrylic with a dotting tool.
3
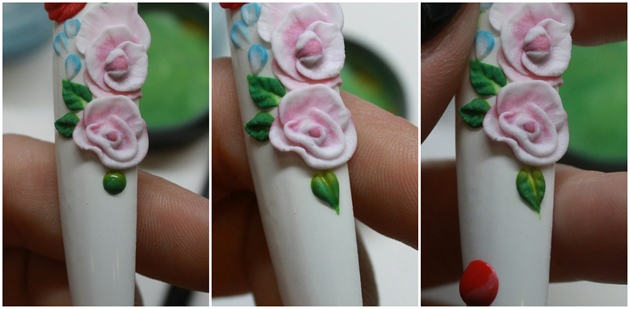
The leaves are made using two shades of acrylics, green and yellow. Take a small bead of green acrylic and dip it in yellow acrylic. Then place the bead next to the flower and let it dry a while. Shape the bead with your brush and add small lines on the leaf using your brush or some other tool.
4
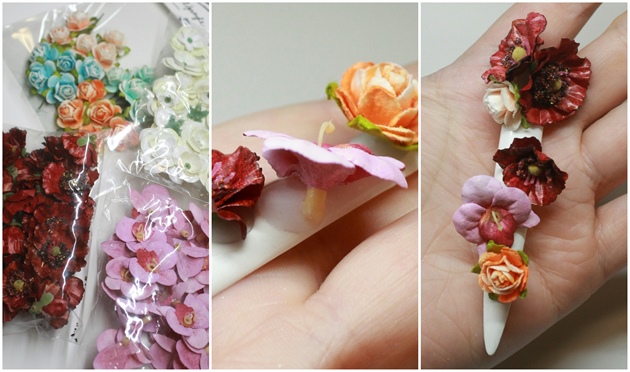
I bought some artificial flowers for the nails to bring them to "life". I attached the flowers using acrylic.
2 Artists like this Photo
Write a Comment
Submit