Jadis; once the most infamous ruler of Narnia. Jadis forced the people of Narnia into a hundred year state of winter. In my nail creation, I wanted to show case the Ice Castle, bedazzled in Swarovski crystals and surrounded by some main focal points from the classic tale. I used only liquid powder and acrylic to sculpt the castle and Jadis's crown. I hand painted the 5 tips using acrylic fluid paints.
Step-by-Step Nail Art Tutorial
1
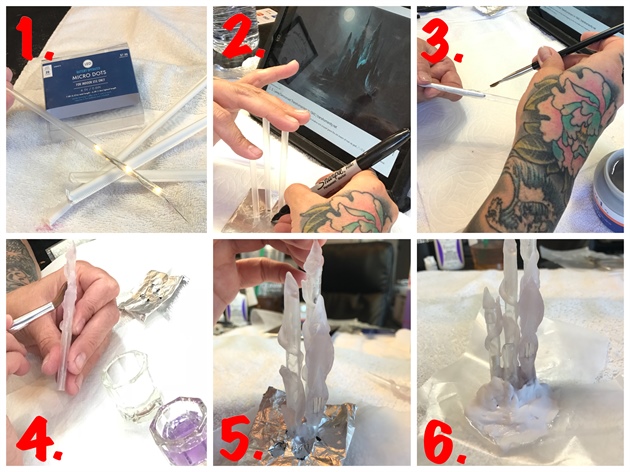
To sculpt my castle, I used a clear plastic drinking straw as the base for my towers. I then used a hard gel coat over the straws and cured to give my towers structure. Once cured, I used liquid powed and acrylic to form my castle, tower by tower. Once my towers were created, I placed them on a piece of foil to support the base using more acrylic, being careful not to cover the ends of my straw base as I later would place lights inside.
2
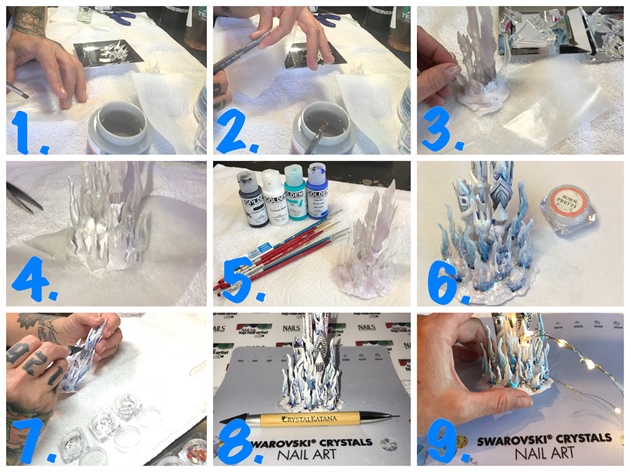
Once my castle was free standing, I used clear hard gel and made micro icicle shapes on wax paper and cured. Once I had several itty bitty pieces, I began to glue them individually to the base making the appearance of ice surrounding my castle. I then painted my castle, sealed it with acrylic coating spray and gave it a chrome dusting to enhance its majestic appearance along with a ton of Swarovski crystals!
3
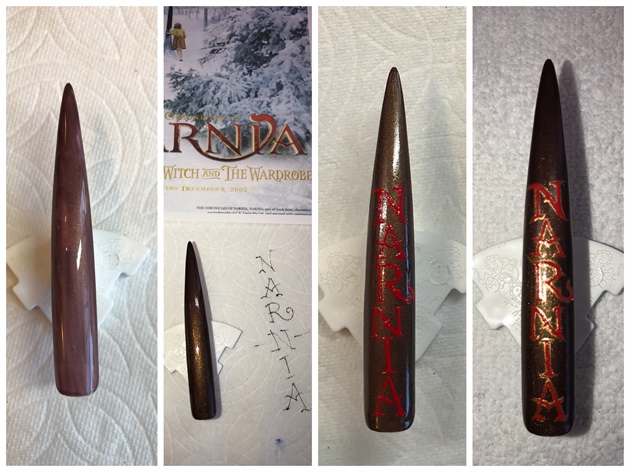
Carefully lining up the letters for "NARNIA", I first start with the middle letters and worked up and down to make sure my centering was perfect. I used a gel polish as the base and acrylic fluid paints for detail.
4
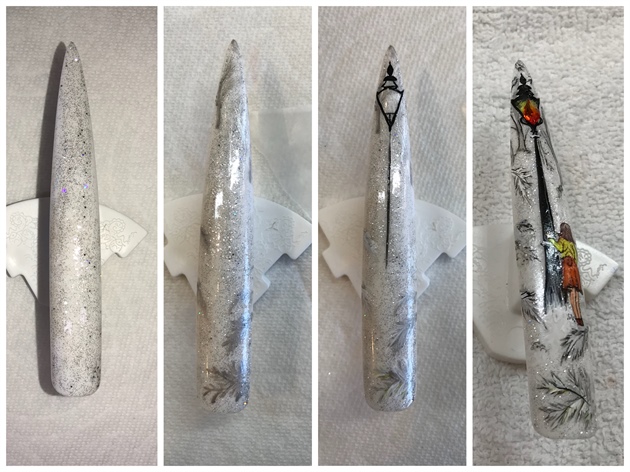
Using gel polish as a base, I started with painting the background of the forest first. Then centering my light post as the focal point and finally painted the girl and finished with Swarovski crystals.
5
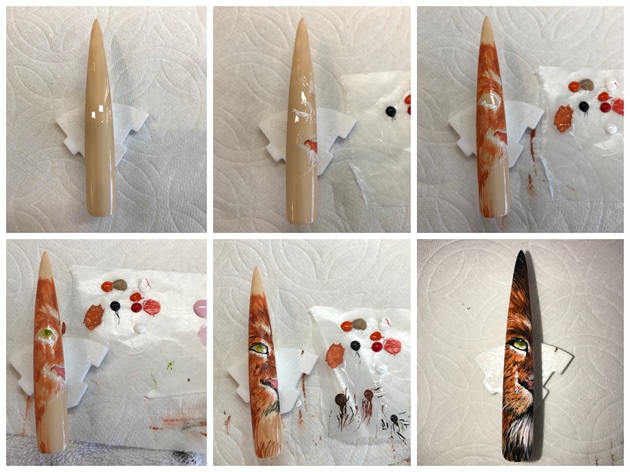
Finally, my favorite piece was Aslan the lion. Using gel polish as the base and acrylic paint for detailing, I painted in layers first starting with his nose to center and then worked around that to make sure Aslan's eye and mouth were properly placed. Then more layers using different shades of brown, orange, black and white until he came together.
6
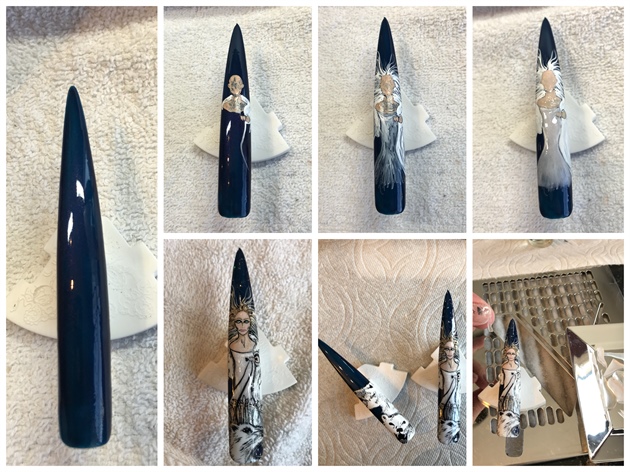
The white witch was done using a gel polish as a base. Centering her body with both acrylic paints and gel paints, I formed her body and positioned her polar bear army around her. I used some left over icicles from my castle to give her an ice crown.
7
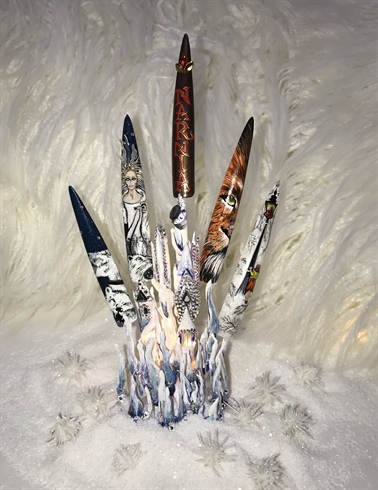
Extremely carefully at the end, I positioned all of my pieces together with glue and inserted micro LED lighting to the straws within my castle to enhance the effect and lastly, added a bit more Swarovski's!
10 Artists like this Photo
Write a Comment
Submit