Each week I am challenged to come out of my vintage comfort zone more and more. The judges have asked that I show them something new and I’m taking that advice to heart.
Well…this week, I’ve even surprised myself! There is nothing vintage or previously seen about my entry. It almost has a dark feel about it. I must say…I LOVE it!!!
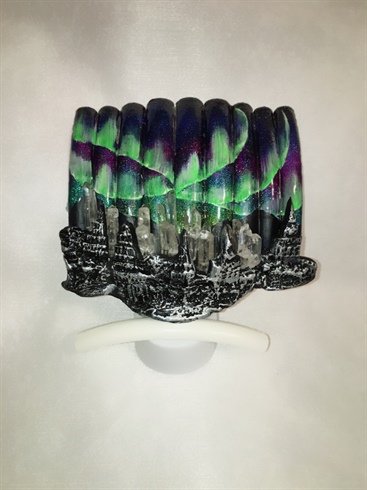
Our sponsor has asked us to recreate our version of the Northern Lights by portraying cosmo nails. I’ve given you both, complete with a northern village scene.
Each village-house sits on a long nail tip and are lit with color changing aurora lights. The quartz stones resting against the nine vertical nail tips are also lit.
Step-by-Step Nail Art Tutorial
1
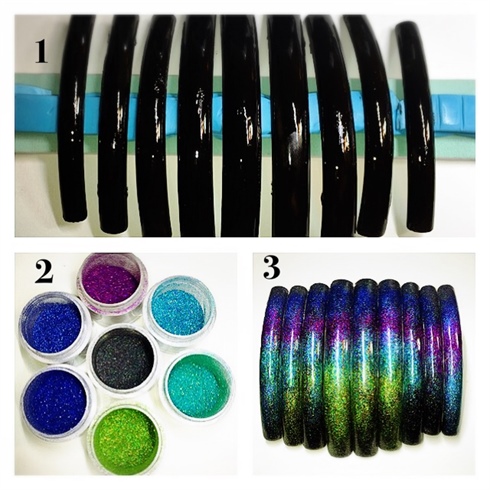
1. Prepare nine nail tips with two coats Black Pool Shellac. 2. You’ll need seven glitter selections. Shown are the Wildflowers micro-glitters. Micro means the pieces of glitter are much smaller and work better for this project of creating the cosmo sky. 3. Working from darkest to lightest, apply glitter in tacky layer of Shellac.
2
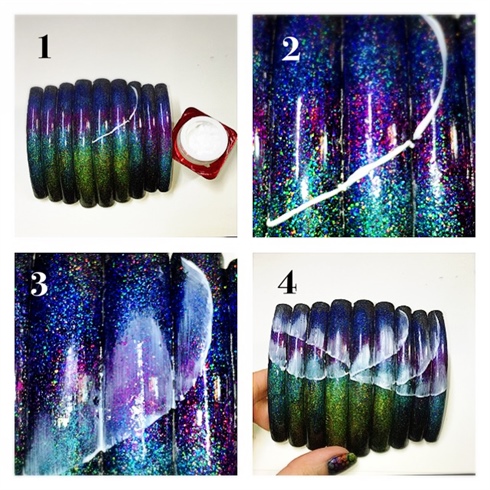
1. Adhere nails to each other and place string of white hard gel to begin creating northern lights. 2. Do not cure 3. Using a flat brush drag gel in one direction until desired effect achieved. 4. Cure, top coat & remove tacky layer from all nails.
3
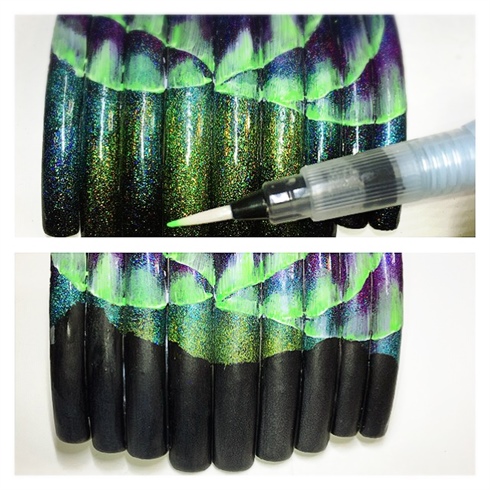
1. Using a water brush (Wildflowers) float green acrylic paint over top of white northern lights. Several coats are needed, allowing to dry between layers. 2. Add mountain range with black acrylic paint.
4
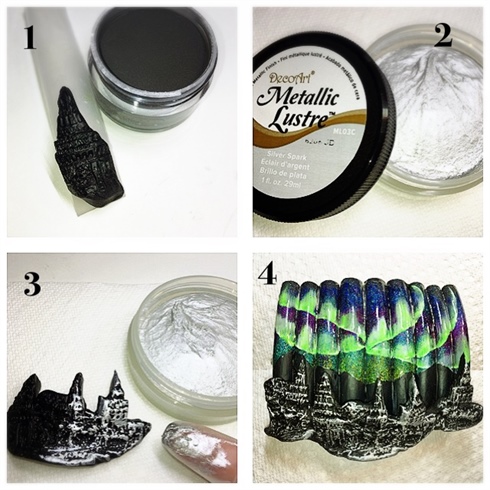
1. Using black acrylic on an Arabella form, sculpt village scene. Feel free to do all in one piece, but it’ll work much better to do in several smaller pieces and attach them together on the nails with black acrylic. 2. You’ll need a silver “rub-on” paint. This is sold in the stencil section of craft stores. It has the consistency of butter and does not have to be cured. 3. Using a gloved finger, lightly rub the silver over the black acrylic pieces. This is what is known as “accent highlighting” in the artist world. It’ll bring out all those lovely features that no one would otherwise see. 4. Attach pieces to nails with black acrylic.
5
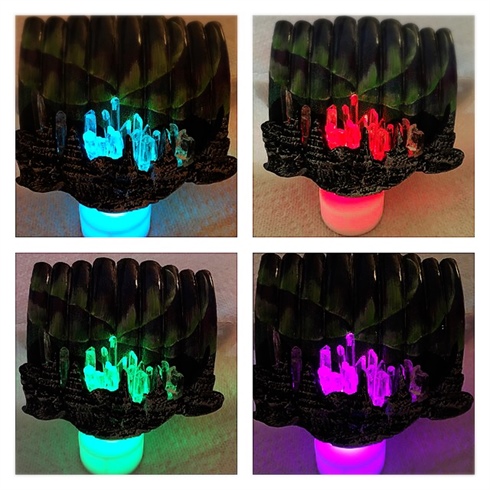
Underneath village scene, insert color changing aurora tea light. These can be purchased from Amazon. Between the village scene and the mountains you’ve painted on the nails, tuck in some clear quarts stones. NOTE:Because you’ve built your black acrylic piece on the Arabella form, they have a natural c-curve to them. You don’t have to worry about having space to put stones…it’ll already be there.
6
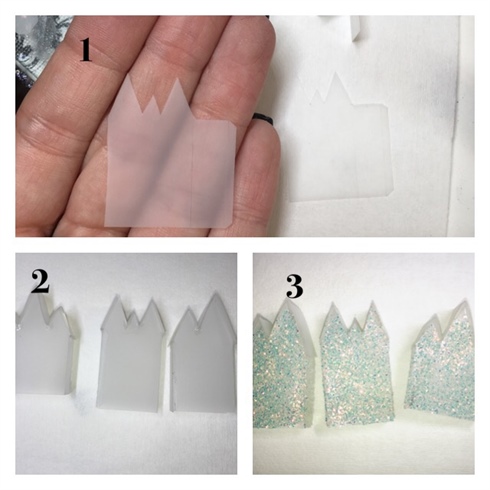
1. Cut out village scene house pieces from cured matte gel. You’ll need two of each piece so that your houses are 3D on all sides…not like they’ve come from a cookie cutter. I’ll provide a link for the pattern I modified in the comment section. 2. Glue pieces together. 3. Coat with no cleanse top coat and sprinkle with glitter, cure.
7
Add the 10th nail tip to the bottom of the piece. This will hold your winter village scene.
8
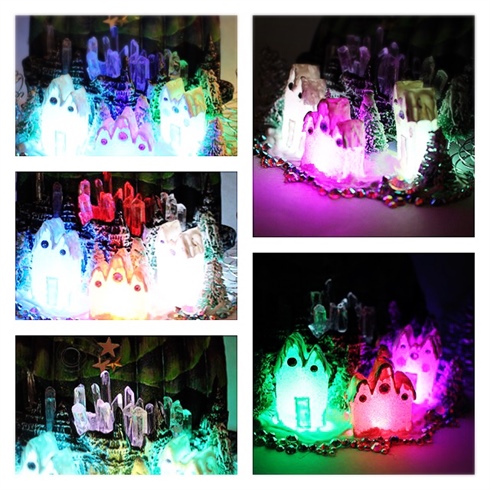
Add three more color changing lights under the 10th nail (in previous photo). Place village houses over top of the lights.
9
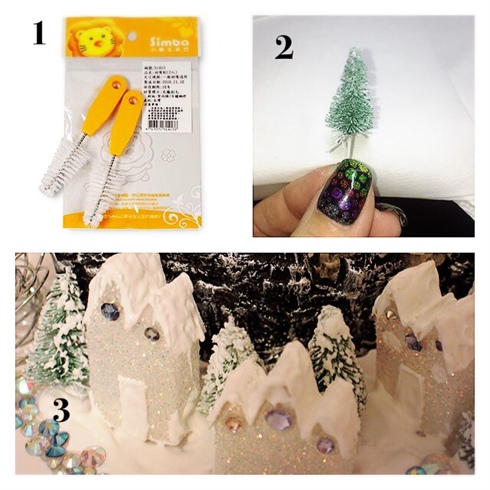
1.Winter trees were made from baby bottle brushes (Dollar Tree). Spray paint them green and then tip them with white, hard gel. 2. Fill in around trees and village houses with white hard gel sprinkled with white acrylic powder. Cure, add wire trees to the side & crystals.
10
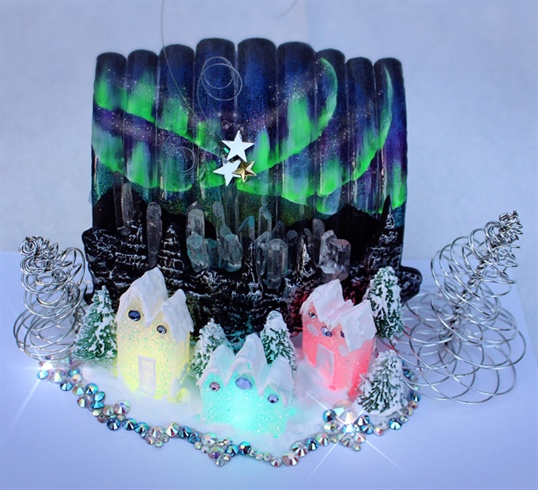
For the final touches, airbrush the northern lights to soften them a bit and add the northern star in the middle as shown.
One Artist likes this Photo
Write a Comment
Submit