This week we were asked to show you the neighborhood that has most influenced our artistry. Without a doubt, I knew immediately what I had to create.
A couple years ago, I signed up for a business class with Inspiring Champions…I couldn’t afford it at the time, but I felt it was an investment in my career. That class was in Orlando, FL. I’d never been to that city and oh my…the TRAFFIC was insane. Six months later, I was invited to attend a week-long nail artistry camp, and guess where it was? ORLANDO! Ha ha…someone upstairs was teasing me.
This year, I was asked to be a guest artist at the largest international beauty show in the USA and it was….you guessed it, Premier Orlando.
Each of those trips to Florida proved to be a monumental stepping stone for me in growing my business.
Now, I’ve not been to Disney because every one of those trips were working trips. I serve a large clientele here in VA, so I returned from each of them and went right back to work the next day. My piece this week has been designed only from what I can interpret from pictures.
Enjoy my little tour through Orlando as I highlight some of the pieces of this sculpture for you.
Step-by-Step Nail Art Tutorial
1
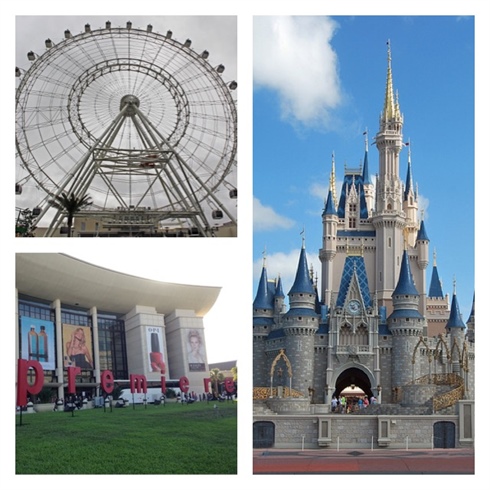
My Inspiration for this piece.
2
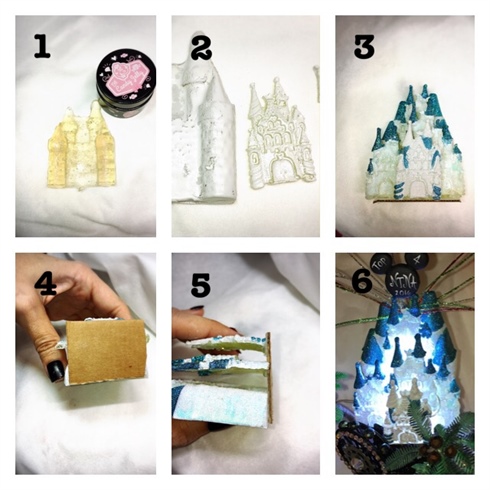
1. Using hard gel, sculpt out the main body of the castle. This portion does not have to be perfect because you’ll be attaching other pieces to it. Don’t worry if your gel discolors slightly. This is caused from building up the layers so thick, it tends to yellow when you cure it. 2. Paint castle with white gel and sculpt out tiny castle. You’ll need four of the small ones. 3. Paint with gel polish and attach the pieces together with a bit of nail glue. 4 & 5. Glue on to a cardboard piece leaving space in between each layer of the castle. You’ll need to be able to cut through the bottom of this cardboard later to thread the lights through. 6.Lit up castle.
3
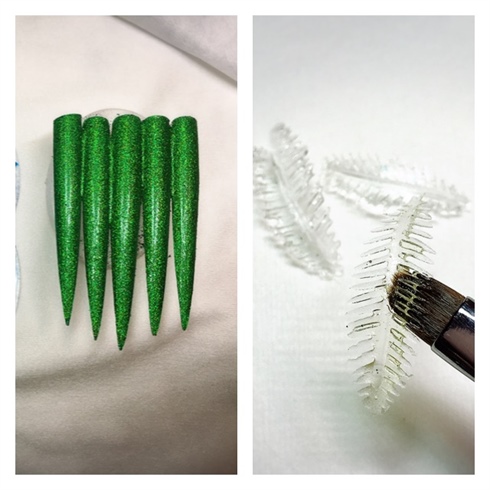
Prepare five nails with green glitter gel polish. 2. Sculpt palm trees from hard gel and make the tiny palm leaves (you’ll need 80 of them). A small brush is essential for the leaves. Just paint the gel out on parchment paper and cure. You can do several at one time. GEL TIP: If your gel is too oozy, meaning it’s running together and you’re not able to achieve the detail you’d like, sit it in some ice water. This will help firm it up and it’ll keep its shape a bit better.
4
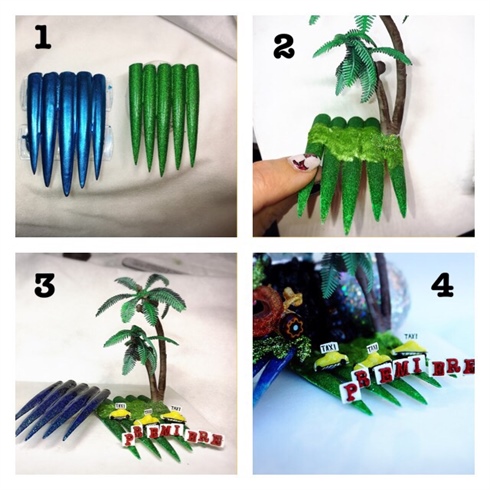
Make three taxis from yellow gel on a nail form and your premiere signs from gel polish. These first five nails represent the Premiere Beauty show, of course. Paint the second set of five nails in various shades of blue, glitter, gel polish. Attach to display board about a 1/2 higher and slightly overlapping the green ones.
5
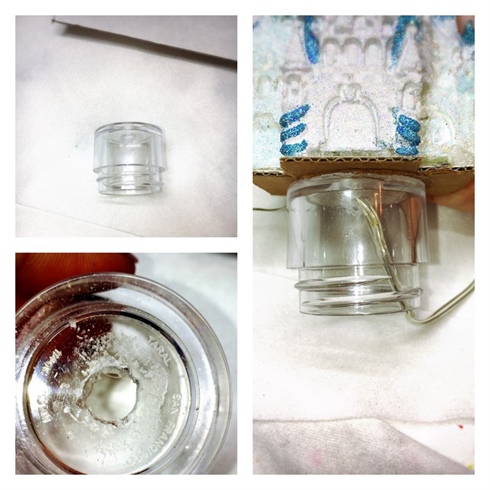
Prepare an empty glitter jar by drilling a hole in the center. This will hold the battery pack for your light as well as serve as a riser for your castle.
6
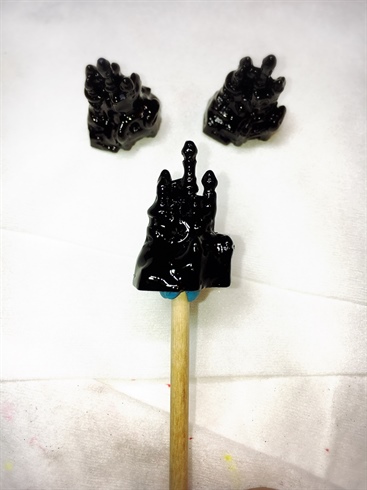
Mold three tiny castles from hard gel and paint with black gel. These will be used to hide the mechanics at the base your castle (the battery pack). A good tip for any artist: what’s meant to stay in the background, such as these, don’t really need painted details.
7
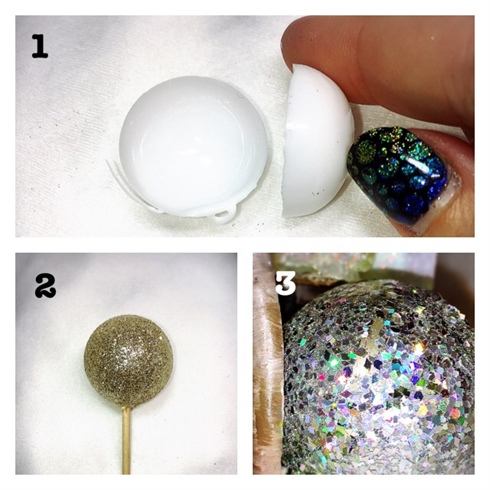
Epcot center: Using a rubber bouncy ball, dip half way into white hard gel. Cure and remove gel. Repeat. 2. Attach the two pieces together and cover with glitter gel polish. 3. You’ll need some diamond shaped Paillettes and no-cleanse gel top coat. Apply them individually, a few at a time into the wet gel, and cure. This is time consuming but worth the effort.
8
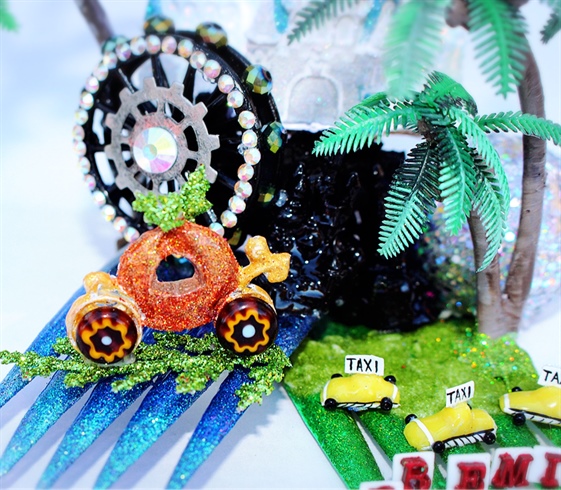
Attach all of these elements to the blue nails. I love the contrast between the pumpkin carriage and the yellow taxis.
9
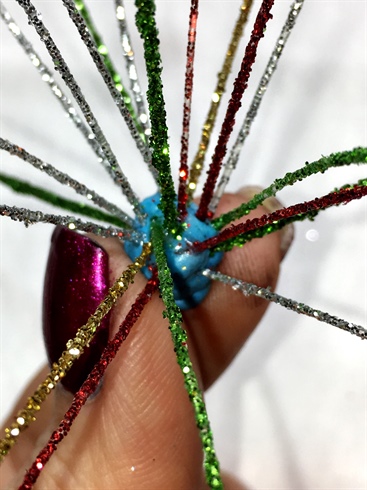
To make the fireworks atop the castle, simply paint out strands of glitter gel on parchment paper and cure. Using a small bit of blue tack, insert the strands as shown. Cover blue tack in hard gel and cure
10

Finished product lit up. Please note: the lighting had to be dimmed slightly so you could see the castle was lit up.
2 Artists like this Photo
Write a Comment
Submit