Day of the Dead is a Mexican festival celebrating death and honouring deceased loved ones. My inspiration for the nails, for this first pre-challenge, came from the juxtaposition between life and death and depicting both within the same image, to create this I designed a face. The face in my design is a living face but painted to represent a face of the dead, it is symbolic to demonstrate how our deceased loved ones live on through us and within us, even after they have passed. Marigolds are an important flower within this festival and I loved the symbolism of them and how they are believed to guide the spirits back to us due to their bright colours and fragrance. I really wanted to include these within my design and painted them in multiple colours to reinforce that this festival is a celebration and not a day of mourning. I found a beautiful piece of Mexican folk art that specifically inspired this (you will see a mini moodboard in my first image) and I used this to surround the face to bring the piece to life. The beautiful Swarovski crystals were used to bring an extra dimension to the image and complete the overall look.
Step-by-Step Nail Art Tutorial
1
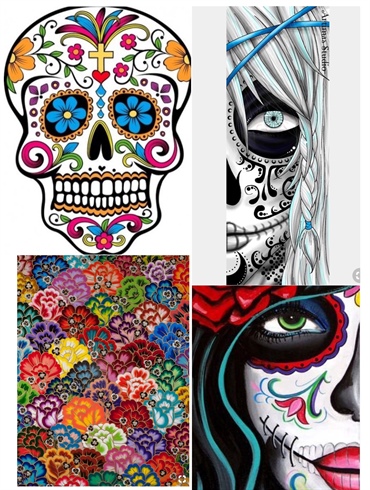
this is a mini version of my moodboard, in particular the Mexican folk art and the imagery of skulls and living faces/
2

begin by selecting your nails and painting them with two coats of white polish and finishing with a matte top coat. the reason I favour matte top coat in these circumstances is that it is much easier to sketch on and erase - if you need to.\n\n*I apologise for the image being side on but it wouldn't upload the right way round*
3
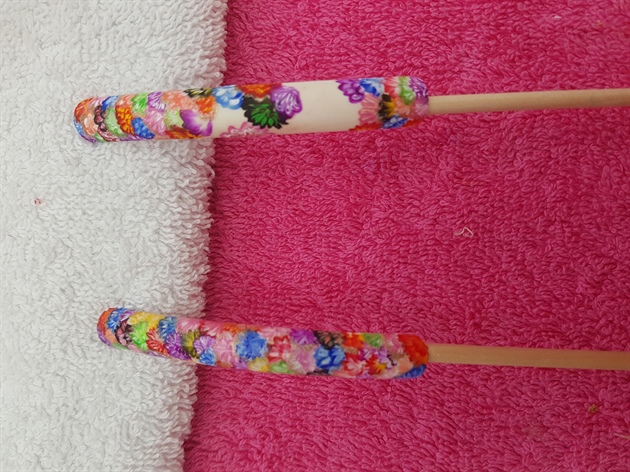
Begin by painting the two outer nails first, these two nails are going to create a large portion of your frame. to create the marigold inspired design I used a one stroke nail art brush and paints. each flower overlaps another so there are no complete flowers in the image. begin at one end of the nail and for each flowerselect two colours - one lighter and one darker - always having the darker colour of the two on the outside of your flower to create a bold outline and definition. using a one stroke technique create your petals by using an upwards, narrow stroke that creates a slim horseshoe shape (like an upside down U). work your way down the nail and around the edges building up the image and always ensuring that two flowers of the same colour are never next to each other. Once dry highlight and define some of the flowers with a gold gel paint and cure. Cover teh nails with a gel top coat, cure and remove the inhibition layer.
4
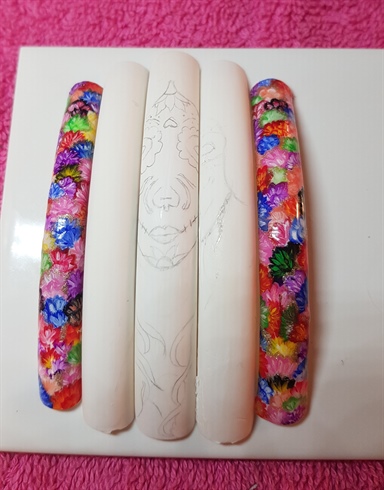
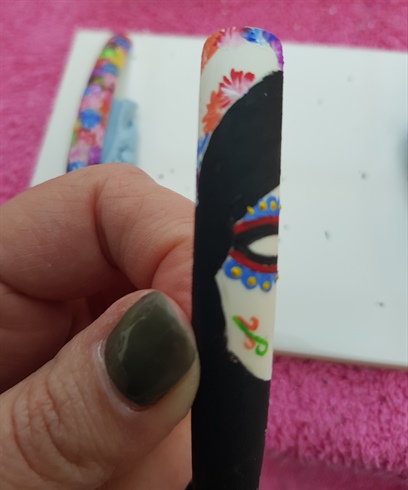
The three central nails are going to be used for your face. begin by sketching the design before you start painting so as you can ensure your design is in proportion and as you imagine it to be. Use a 0.3mm or 0.5mm pencil to draw your design and always start with the centre nail as this one has the most detail on, the other two nails will need to match up with this one. when you are drawing your design keep placing the nails next to each other to ensure it all lines up.
5
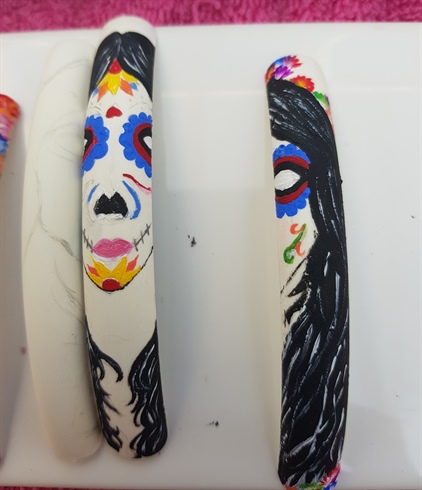
once you have sketched your design you can start painting it. for this I again used one stroke paint as I like the bold colour it creates and I enjoy using it as a medium. complete the paint work on the centre nail and then the two outer ones, so as to create the entire picture. when I am using one stroke paint I always decant some paint on to a tile so as I can mix colours and they are at hand to use. Do not have too much paint on your tile at any one time as it will dry quickly and that will be a waste of product. I used my one stroke angled brush to paint the hair and the Lecente detailer brushes to paint my fine lines and detail of the face. i used a dotting tool for the patterned edge around the eyes. Once I had completed the centre nail and it was dry I highlighted and defined the pattern on the forehead and the chin with a gold gel polish. this was then cured before the entire nail being coated in gel polish top coat, cured and the inhibition layer removed. I didn't do this until all 3 nails were finished however, just in case I needed to tweak anything.
6
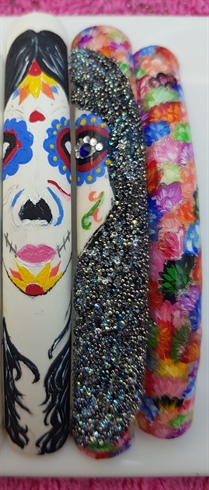
Around the edges of the three central nails is a continuation of the marigold flower frame, you can see a close up here. this is completed on all three centre nails and will vary in thickness depending on the space left and whatever you feel works with your creation.
7
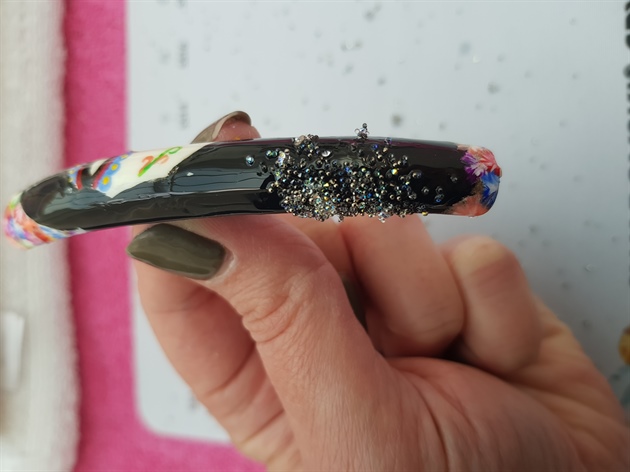
Once all three centre nails are painted and sealed with a gel top coat (and the inhibition layer removed) apply Smooth It (or something like it) to affix your crystals to. Smooth it (or similar) will only be applied to where you want the crystals to be, so as they don't stick in the wrong place. Begin with the hair - as this is the largest portion. I used a mixture of cute mood and rock shock to create the hair. I applied it by placing my Swarovski matt underneath the nail and gently shaking the crystals on to the area. Once applied and positioned cure.
8
When all of the hair has been applied use some Smooth It (or similar) to secure the crystals for the eyes. for these I used crystal clear and capri blue. I positioned these with the use of the Crystal Katana tool. Once in position cure.
10
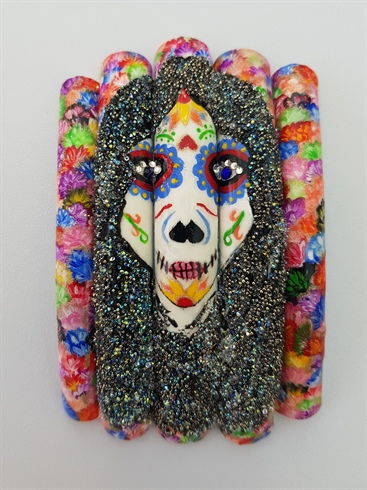
Once all nails are completed place them together to create the mural. Here is the complete look.
10 Artists like this Photo
Write a Comment
Submit