Jan Arnold is a huge fan of couture. We were asked to translate one of her fashionable ensembles onto a nail tip using any mediums you see fit.
I started this assignment doing some research. As Jan always has stunning outfits on various events, tv shows, etc. it was very hard to chose the absolute favourite one. I fell in love with some of them.
I was inspired by the photo that Beth shared with us and I completed it with my favourite ones. I launched a J.A. Couture Salon and displayed this incredible black dress and gold jacket in a shop window. I chose a dress from The Blondes Horror Collection, I think it is unique and perfectly suits Jan. And as a huge purple and flower fan I chose the floral purple dress what Jan’s wearing at Nail’d it! I just wanted to add a little from my style as well.
I hope you will like it.
Please everyone cross fingers for me. Jan will pick a winner, which will be announced this Friday.
You can find the result here:
http://www.nailsmag.com/nexttopnailartist/2015/last-chance
Step-by-Step Nail Art Tutorial
1
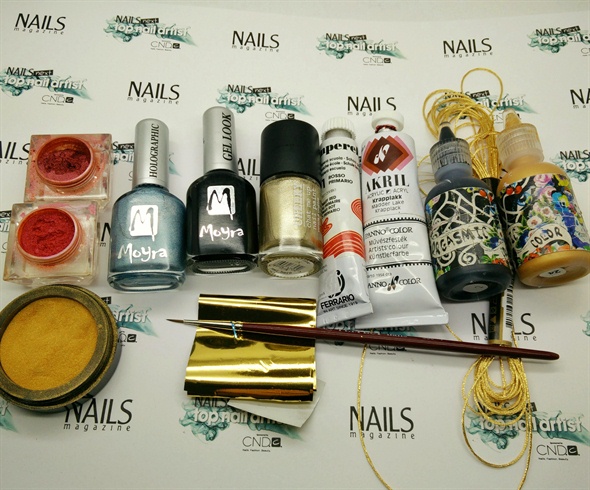
We could use any mediums so I technically used a loads of them... :) This is just a teaser from my favourite ones what I used for this challenge...\n1 long stiletto nail tip * Acrylic system from Nail Harmony and Perfect Nails UK * Gel polish (Gelish) * Regular nail polish (Moyra: Blue Holographic and Black Gel Look, Cheeky) * Gold thread * Pigment powders * Cracking nail polish * Gold transfer foil + adhesive * Gold, black, purple and red acrylic paints * Watercolour paints * Striping tapes * Kitchen foil, masking tape * Sculpting Brush: Nail Harmony * Nail art brush: Perfect Nails UK * LED lamp * Nail file
2
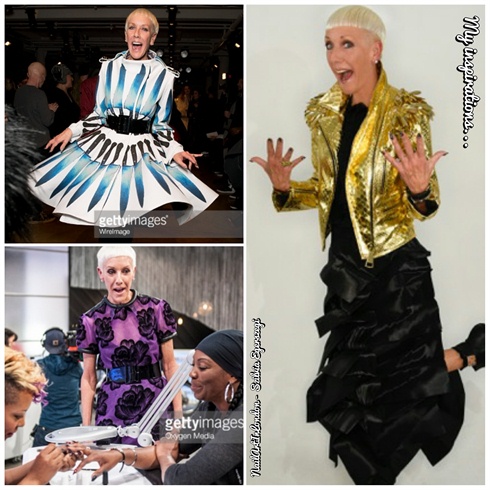
My inspirations were these stunning outfits! <3\n
3
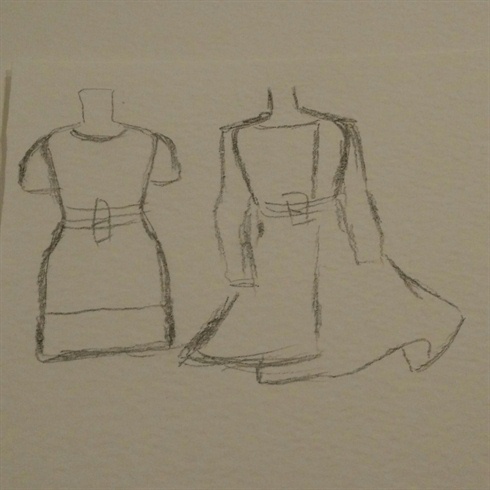
I did a quick sketch from these dresses. I wanted to display them less dominant. I put this sketch into a clear filing bag and I sculpted with acrylic system the flat 3D elements. And of course if it's easier for you, you can print it as well and then you don't need to do a sketch... ;)
4
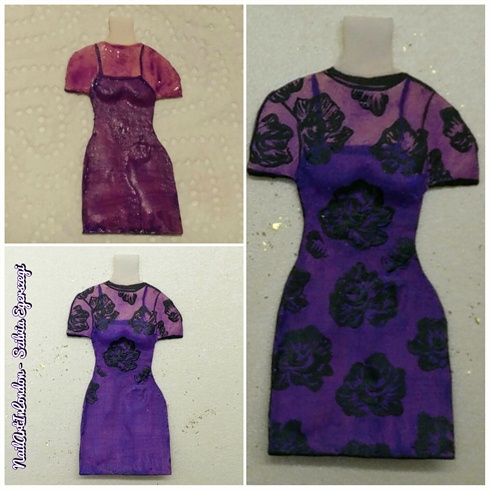
\nI did a quick sketch from these dresses. I wanted to display them less dominant. I put this sketch into a clear filing bag and I sculpted with acrylic system the flat 3D elements. And of course if it's easier for you, you can print it as well and then you don't need to do a sketch... ;)\n\nThe dress were painted using acrylic paints (Polycolor and Perfect Nails UK). I used various purple shades and black. And I used Perfect Nails 300/1 nail art brush for painting the black flowers.
5

\nThe Blonds "Knife" patterned dress was made with the same method. The detaild were painted using watercolour paints and the same brush. The contour lines were painted using Chain Reaction from Gelish. Both belts were made using striping tape. *** You can see a 3d lip on the frame. It was sculpted from acrylic and I painted with cracking nail polish to get an antique effect. After then I painted with gold acrylic paint.
6
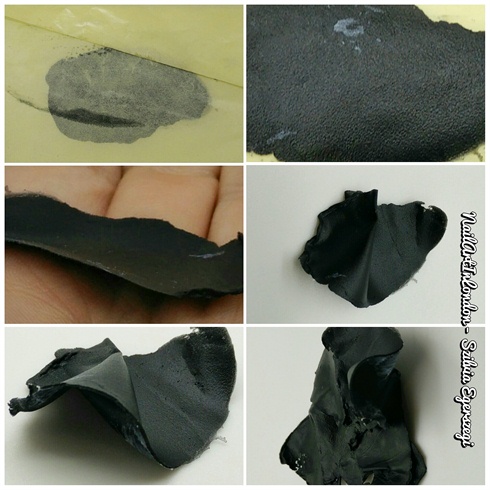
The black skirt were made using acrylic system. I used much more liquid as usually used to to create this element. I put some very wet acrylic balls to a paper form, when it dried a little, I covered with an another paper form and I pulled tightly over with a brush handle so I got a very thin acrylic sheet. When it almost dried I removed the second paper form. I got a quite rubbery sheet so I could create a wave, like a real fabric. I had to do this method very carefully, because it has a very sticky surface and breaks away easily. I repeated the same method several times and I got the layered skirt. I added some regular squares like on the photo.
7
A close up photo about how I layered the skirt. The small acylic pieces were made using black acrylic powder and after I painted with "gel look" regular nail polish to get a shiny finish. *** The body was sculpted from acrylic as well.
8
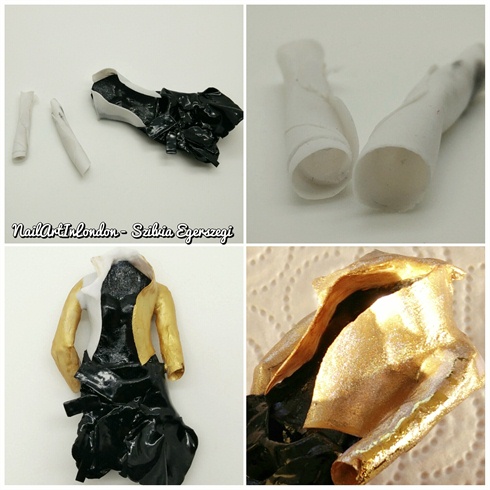
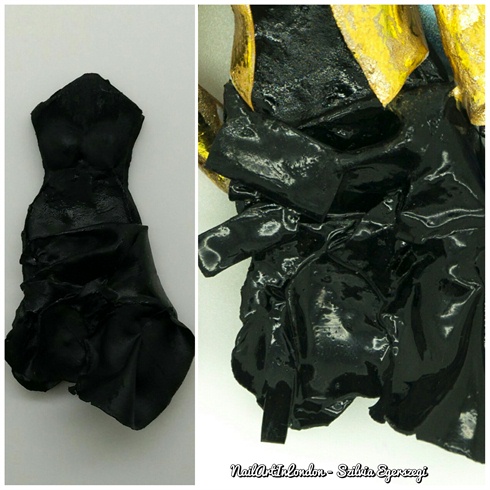
I used the same technique to create the jacket. Just worked with a little thicker “sheets” and cut out the front sides. The sleeve of the jacket is hollow on the inside, I rolled the sheet. * The jacket was painted with acrylic paints, gold nail polish. I used some gold transfer foil as well to get the perfect shiny effect like on the photo.
9
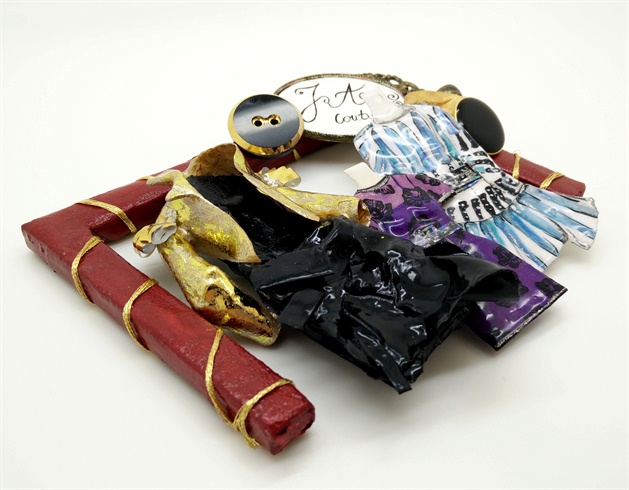
From this angle you can see that the jacket is open and totally separated from the black dress. :) *** Window frame - used kitchen foil and molded with acrylic. Covered with gel polish top and hinted with acrylic powder to get a rough surface. Painted with acrylic paints and pigment powder. *** Sign – used a pendant base and antiqued with black and gold acrylic paints.
10
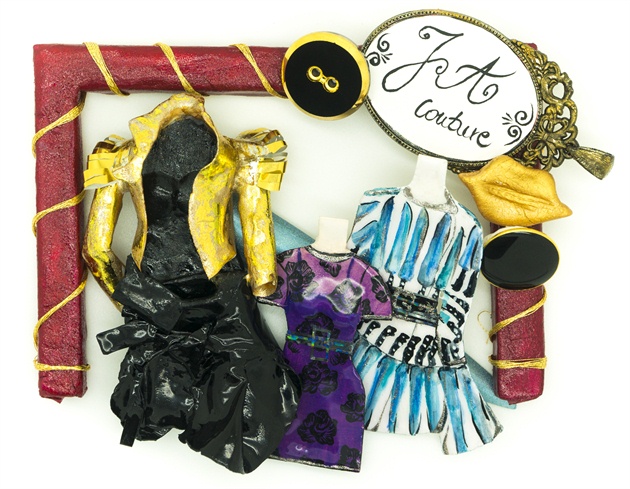
And a close up photo of the finished design. I hope you like it. :) If you have any questions feel free to ask them. :)
Write a Comment
Submit