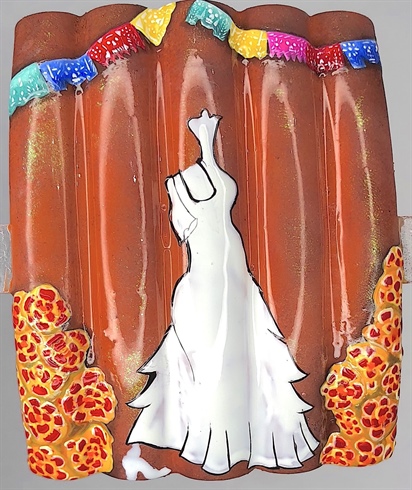
Día de Muertos or day of the dead was the inspiration for this pre-challenge, Drop Dead Gorgeous. As I researched the Mexican holiday and the traditions surrounding it, I was inspired by the beauty found in death. All of the vibrant colors, florals and imagery got me thinking about how I can best represent the holiday through my eyes. When researching the imagery and traditions for the holiday a few things stuck out to me for my pre-challenge. Marigolds, which are called Flor de Muerto, Flower of Dead, are the traditional flowers used to decorate the graves of loved ones because the vibrant colors and strong scent are believed to attract souls to the offerings. The traditional paper banners were used as a back drop to add vibrant colors to the piece as well as signify the wind, which is one of the four elements commonly left for spirits. Finally for my centerpiece, I chose to go with the art work of David Lozeau called ‘Celebration of the Mission’. The skeleton woman is so beautiful even in death and I wanted to represent that through the simple beauty of her face and body. I chose to crystalize her dress to emphasize and enhance the overall beauty of the piece.
Step-by-Step Nail Art Tutorial
1
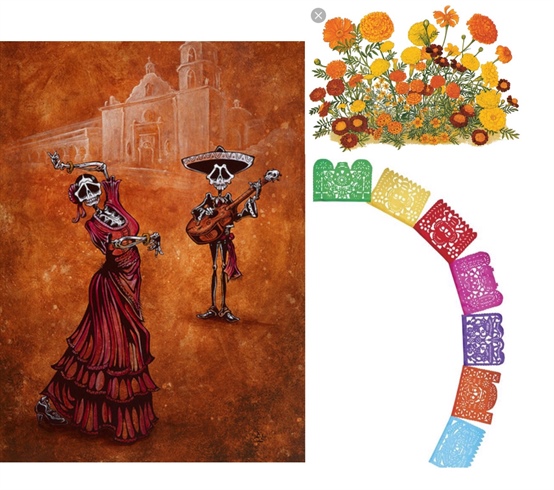
My inspiration for this challenge was taken from the colorful marigolds and paper banners. Both are significant to the Day of the Dead holiday. The centerpiece is from the artist, David Lozeau, I felt the skeleton woman is drop dead gorgeous and that fit the challenge perfectly! \n
2
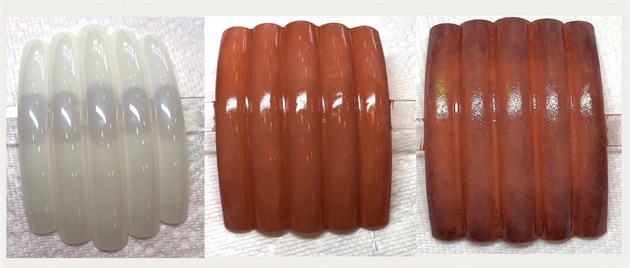
My first step was to attach five extra long tips to a swatch stick using acrylic. Then I evened the height of all the tips using an e-file. I painted the background with a terra-cotta colored gel polish and sponged various shades of brown, red and black to achieve the shadows. Lastly, I added unicorn pigment to the surface in a random pattern to highlight the piece. \n
3

The banners were painted on with white gel polish. The individual parts of the banner were painted to have a gradient effect. To achieve that effect I painted the middle of the banner with the gel color. Then mixed the same color with a little bit of white and painted the top of the banner. Then I added a little black to the same color then painted the bottom if the banner with the darker color, creating an ombre effect. I repeated the same steps until all of the banners were painted. \n
4
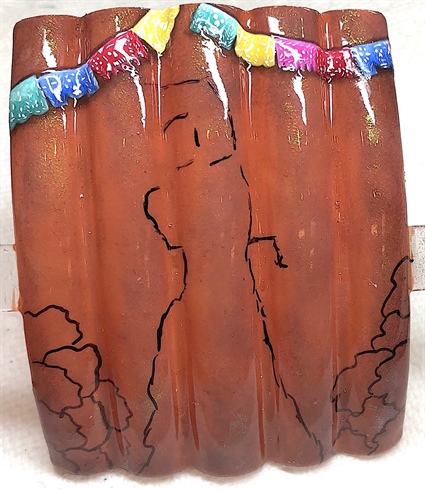
To finish the banners I added detail to each one with white gel polish. Next, I mixed clear gel polish with black gel polish and painted that around the banner to add dimension. Using a thin sharpie I did a rough sketch of the marigolds and the skeleton woman. \n
5
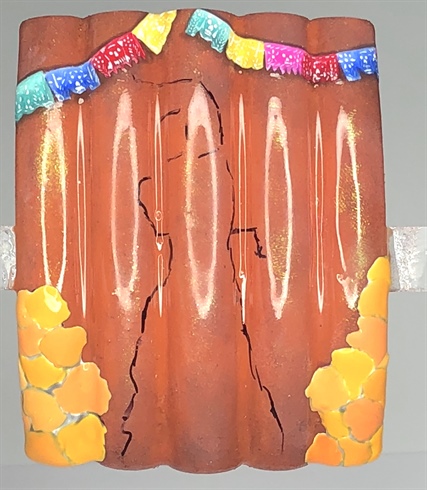
Using white gel polish I filled in the areas where the marigolds will go. Then I used orange and yellow gel polish and mixed 3 shades of yellow to paint the individual flowers. \n
6
Using white gel polish I painted the shape of the woman's dress and foot. Then using black gel polish and a thin liner brush I did a rough outline of the dress. For the marigolds I filled in the petals with different shades of yellow, red and orange gel polish. \n
7
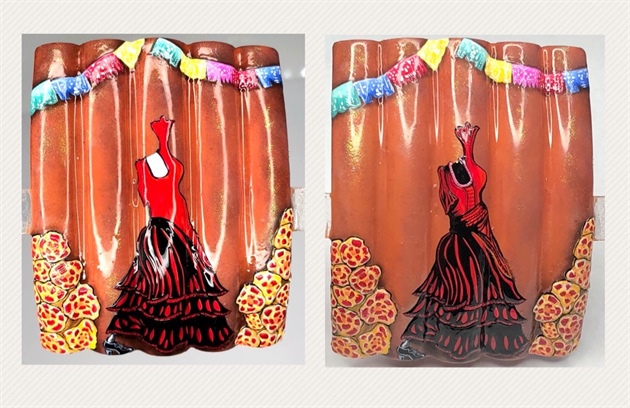
Using a thin liner brush and black gel polish the marigolds were outlined. The dress was painted with a combination of red, orange and yellow gel polish. The dress detail was added and outlined using a fine detail brush and black gel polish. Her foot and shoe was painted in using black and white gel polish shaded together. The clear/black gel polish mix was used again to shade under her dress and around the flowers. For the top of her dress I used a fine detail brush and black polish to add details and shading to the top half of her dress. \n
8
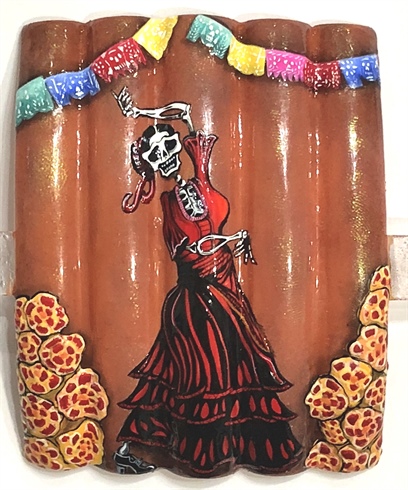
For her arms and head black and white gel polish were used with a fine detail brush. The ribbon in her hair was filled in with a similar gel polish color to her dress. \n
9

Using black gel polish the outline and the background of the flowers were filled in. For the crystal element Crystal Pixie in 'Cute Mood' and ‘Light Siam’ Swarovski crystals were added to the red accents on the bottom of her dress. Crystal Pixie 'Rock Shock' were placed in the black portions of the dress. A mix of 'Volcano', 'Light Siam' and 'Light Siam AB' were used for the centers of the marigolds. A mix of 'Cute Mood' and 'Rock Shock' crystal pixie were used to fill in the marigolds. Swarovski crystals in 'Volcano' and ‘Light Siam AB' were used to embellish the top corners and represents more colorful banners. \n
10
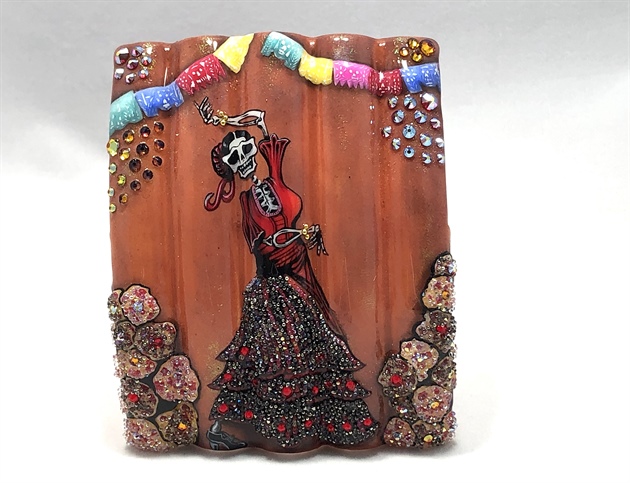
To finish off the piece a few bullion beads were added to her wrists to giver her bracelets. A final shiny non wipe top coat was added and she was finished!
9 Artists like this Photo
Write a Comment
Submit