r the 2nd part of the final challenge (Manus X Machina) sponsored by CND, we were asked to created a set of ten nails inspired by lace.
I took inspiration from a number of images provided by Jan Arnold, however one stood out in particular - a simple, classy, exquisite picture of black and nude lace dress. Researching further, I found the designer was Alexander McQueen. Keeping in line with the theme, and trying to emulate the vision shown by the image, and the designs that McQueen constantly brings out, I wanted the Manus component to be the creation of a set of nails with intricate lace with black and white acrylic for contrast, yet keeping class and couture evident at the same time.
For the Machine process (Machina) element, I decided to use tulle as the under layers of the lace, pigmented silvers and Swarovski crystals to reflect that .
To me lace is very delicate, fine and feminine so for this challenge I felt the need to be masculine yet effeminate to and come up with something unusual - but remain fresh and innovative .
The colour scheme that I have chosen for this challenge is similar to part one as I wanted to create a nails collection just like a fashion collection . Fashion is a huge inspiration to me. When I was younger going through high school, I watched my sister create many wonderful outfits and I remembered attending her fashion show when she finished high school. My sister is always there for me - so this to me is a way of saying thank you - whilst channeling my creativity and my inner designer.
I also wanted to create an innovative, luxurious and high end nails collection to reflect Jan Arnold, CND and her team as they been at the forefront of the industry for some time, and have created many wonderful nail collections for big fashion houses.
I want to thank nails magazine team, Jan Arnold for another amazing theme. Once again, this challenge and the whole process has been a great learning curve.
I hope you are all inspired by my creative process and designs.
Step-by-Step Nail Art Tutorial
1
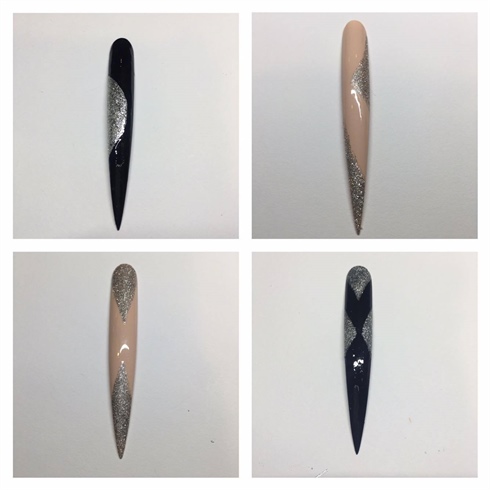
For the background I used black, nude and white gel polishes. I painted two coats and cured each layer for 30 seconds. I then used a small liner brush and silver gel polish to carefully draw different shapes of triangles to the background. This will allow me to add Swarovski crystals to the design later. I then cured for 30 seconds and followed this by applying a gel top coat.
2
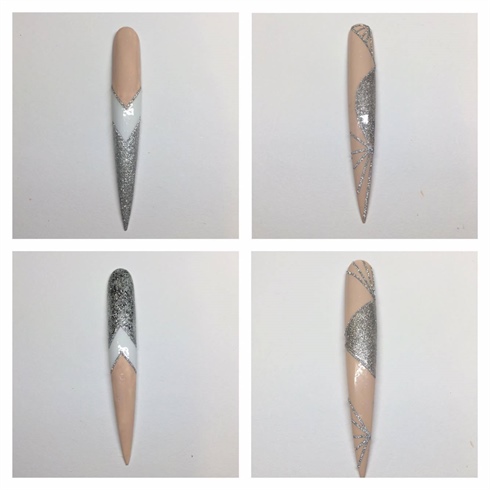
I used small glitter tape to create sharp and clean lines to offer the illusion of a machine made process. I carefully cut small piece of tape and added this to the nails as shown in the picture.
3
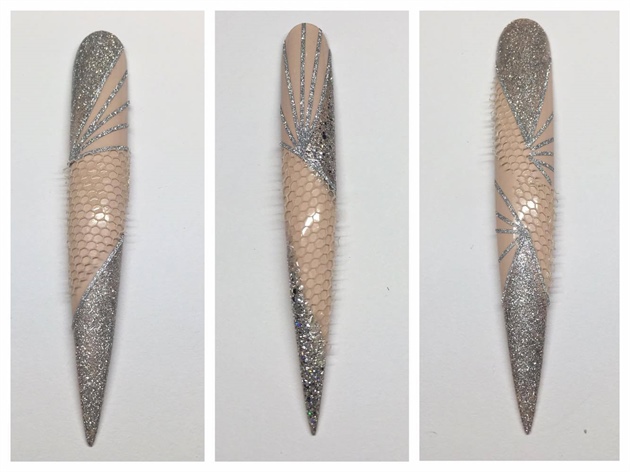
I cut out tulle in different shapes to further enhance the machine made process. I placed them in the desired positions and attached them with small amount of nail glue using a small dotting tool.
4
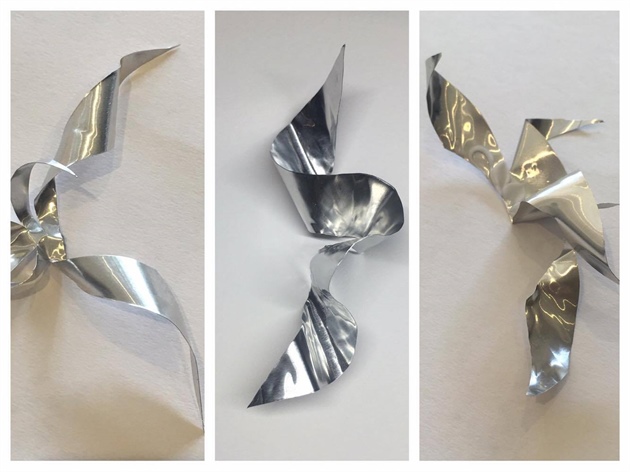
For the hand made process (Manus), I drew the design on the tin foil, cut it out with a small pair of scissor, and bent the tin foil into the desirable shape.
5
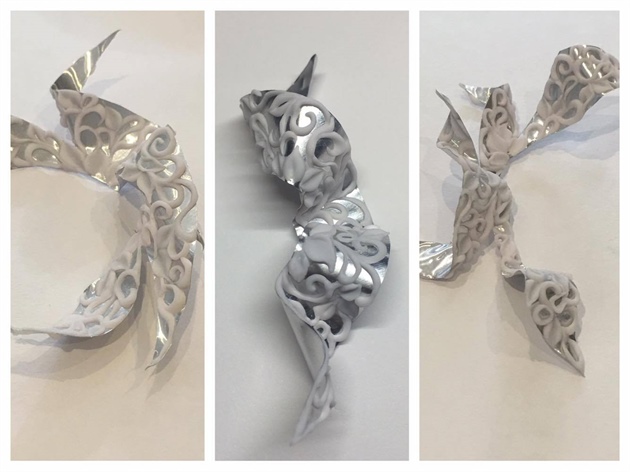
Using small beads of acrylic, I built my lace into the shape of leafs, swirls and tear drops and linked them together.
6
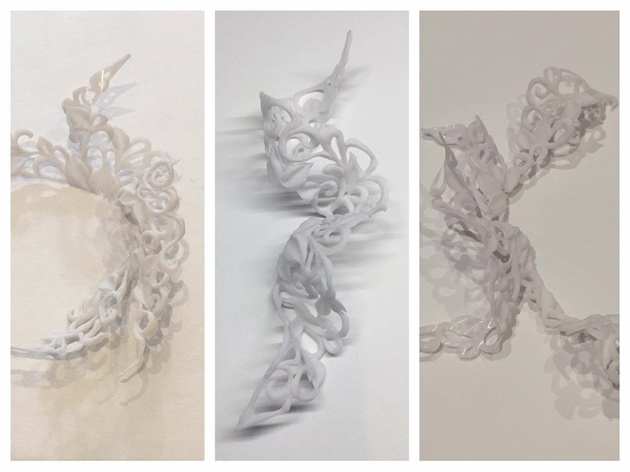
Using a metal spatula, carefully peels the lace from the tin foil once it is set properly and then cut out tulle to the exact shape of the lace and attach it with nail glue.
7
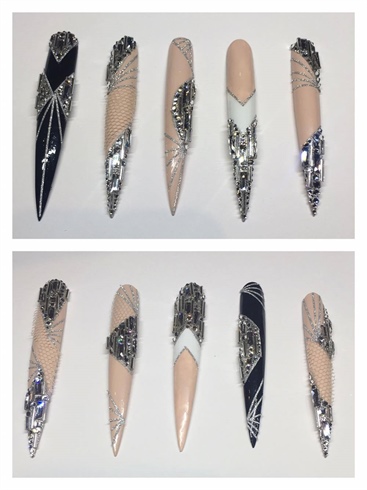
Using glue and gel, I placed a selection of carefully selected Swarovski crystals on the nails on the section that I drew earlier. This emphasises further the machine (Machina) made process.
8
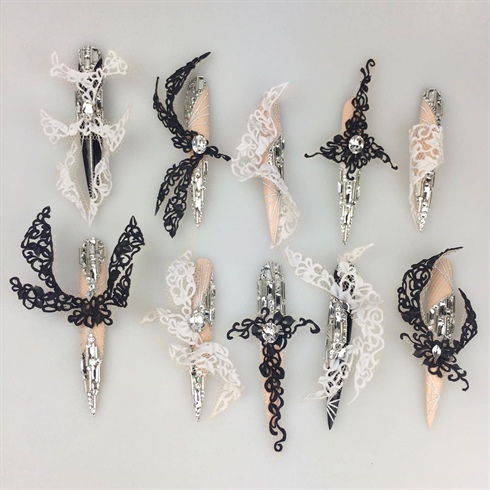
I attached all the lace pieces onto the nails with nail glue and acrylic.
15 Artists like this Photo
Write a Comment
Submit