The theme for part four of the Manus X Machina final challenge was feathers, and once again we were given several pictures as points of inspiration by Jan Arnold.
Delving into the detail, I was pulled towards the differentiation between the sculptural and layering techniques and the contrasting elements between a hard (sculptural/masculine) look versus a soft (layering/feminine) look.
So for this challenge I wanted to create a sculpture and layered look through the use of both natural and hand made feathers.
With the hand-made (Manus) element in mind, I created different sizes of feathers through the use of different sizes of nail tips, whilst combining gel polishes, gel blending and pigments with individual hand painted feathers detail. From there, I shaped them feathers to allow them to be placed together to bring my design concept to life .
For the machine (Machina) element, and after extensive research, I was able to secure a few pieces of machine made feathers together with natural plumage which I altered to suit the design. I also utilised my thought technique and brought together metal 'feathers' which also I believed amplified the look I am trying to achieve.
To ensure that my design is cohesive but yet still has that 'what will he do now' excitement to the challenge, I continued to incorporate Swarovski crystals, and core colours that were previously used, but introduced new colours - dark gold, brown, maroon with the contrast of vibrant orange and golden yellow. These colours represent class, quality, strength and boldness, yet remain with regal view of high fashion.
I hope I have taken you to another corner of creativity and I hope you are inspired by this part of the challenge .
Step-by-Step Nail Art Tutorial
1
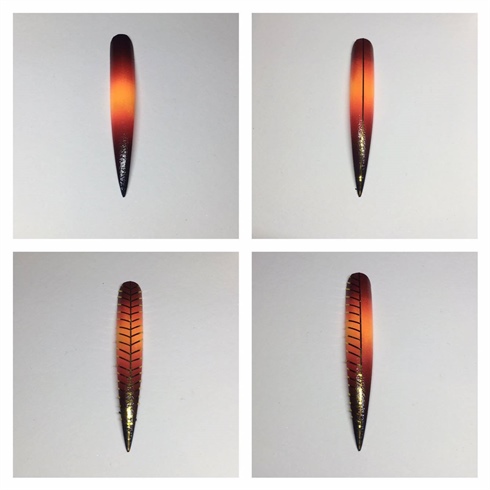
Shape the nails to a point, then buff the surface of the nails. \nI then layered yellow, orange, red, maroon and black gel polish and blended them on the nail tip with the sponge, curing for 30 seconds, and then repeated the same process until the colour is vibrant and cover the entire nail. \n\nThen I used gold stripping tape to create a feather-like base. I placed the first stripe in the middle and followed this by adding feather like designs in a diagonal process with a non cleanse gel top coat.
2
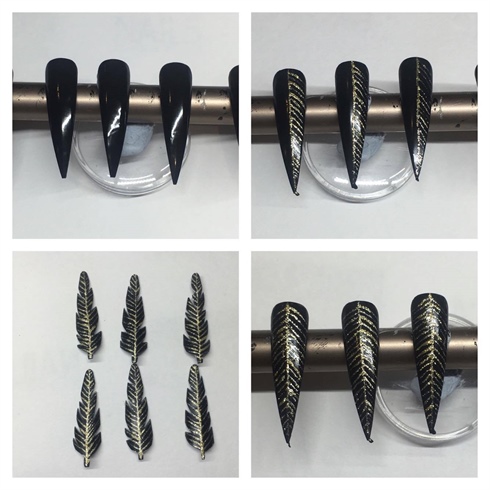
Using black and gold gel polish, I painted the tips with two coats of black gel polish, curing each layer for 1 minute. I followed this by removing the sticky layer using a lint free alcohol wipe. \n \nI then used gold gel polish to draw fine lines to the tips as shown in the picture and cured for 30 seconds. Following this, I applied a non sticky gel topcoat. \n\nUsing a 120 grit file, i carefully filed and rounded the end of the pointy tips to reflect a feather like shape. Using a small curve scissor, I cut out the tip into the feather shape. These is to be used to the design at later stage .
3
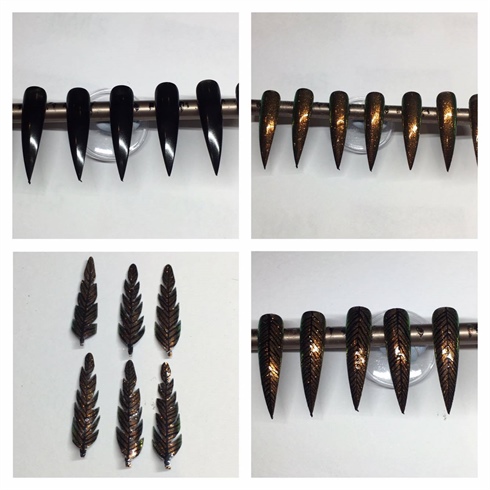
I applied a black layer of gel polish to a the size 10 tip and cured, but this time for only 20 seconds. I followed this by brushing on the gold pigment and add a non sticky gel top coat. \n\nOnce the top coat is cured, i carefully painted vertical lines in the middle of the tip, followed by finer diagonal lines through the entire nail. \n\nI again applied a final coat of non sticky gel top coat and cured it for 30 secs. I File and cut the tips as mentioned previously to create more feathers .
4

Using yellow, orange, red, maroon and black gel polish, I layered the colour as shown in the pictures. \nI Carefully dapped the sponge onto the gel colour layout, then gently dapped the gel colour onto the small tips. I then repeated the same process until the colour was smooth and applied a non sticky top coat before adding further feather details and then cut out. \n
5

carefully selected the plumage feather that are full and intact, and cut them into half. \n\nKeeping the bottom half of the feather, I cut the tip of it diagonally into a point, as shown in the picture . \n I then carefully strip away the excess feather to achieve the desirable shape . I repeated the same process to create more feathers which I will be using to add to my design at a later stage . \n
6
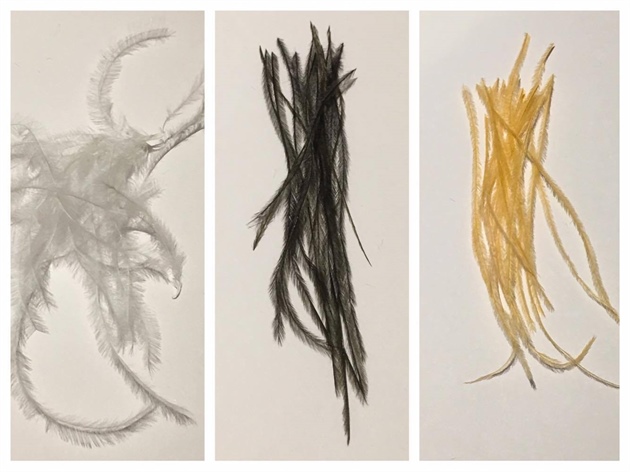
Carefully peeling off the ostrich feathers using fabric and different colour fabric dyes, I mixed the colour choice with room temperature water . Then I placed the ostrich feathers into the already mixed water and dried it with a hair dryer to achieve the different ostrich coloured feathers as shown in the picture . \n
7
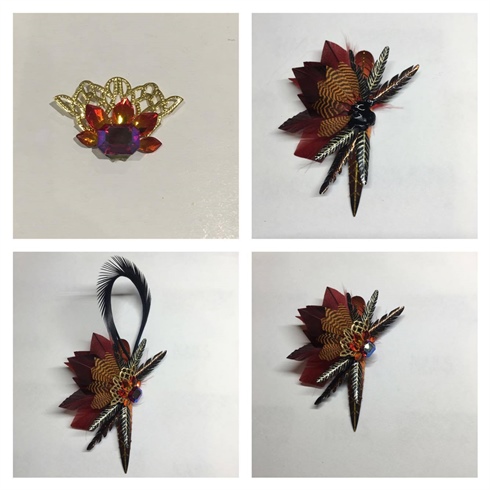
Once all the elements are created and altered I adhered them on to the nail with gel, nail glue, acrylic and monomer.
8
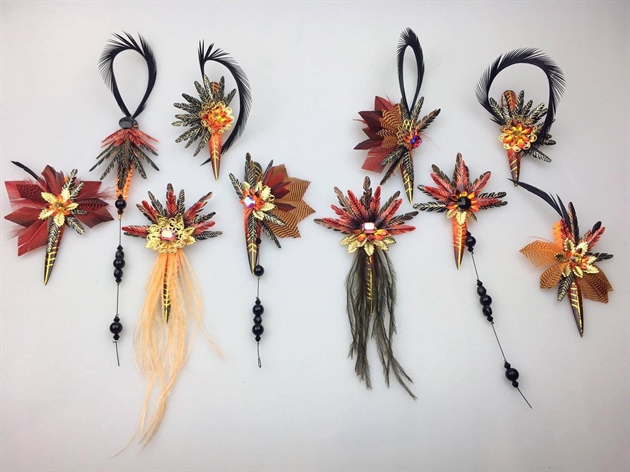
Here is the final result, i hope you all enjoy my tutorial.
6 Artists like this Photo
Write a Comment
Submit