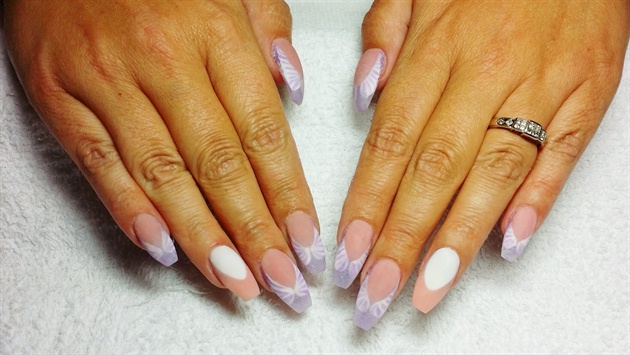
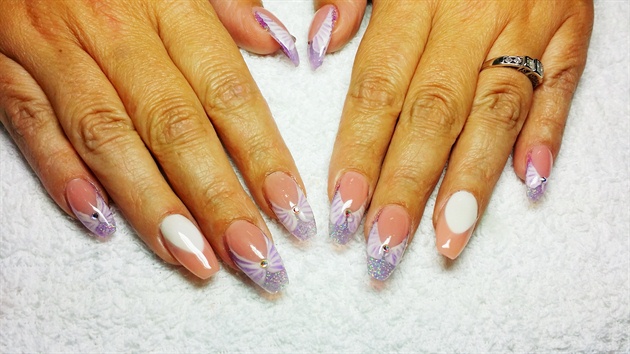
While looking at the ad campaigns from Entity Beauty, I was immediately drawn to the elegance of the nails and designs. The two campaign flyers that resonated strongly with me were the wings and calla lilies. The classic hues of pink and white stood out against the softness of these two designs. I wanted the wings to be my focal point with the delicate calla lilies as accents. I used acrylic, gel, acrylic paint, and Swarovski crystals to create this set.
Step-by-Step Nail Art Tutorial
1
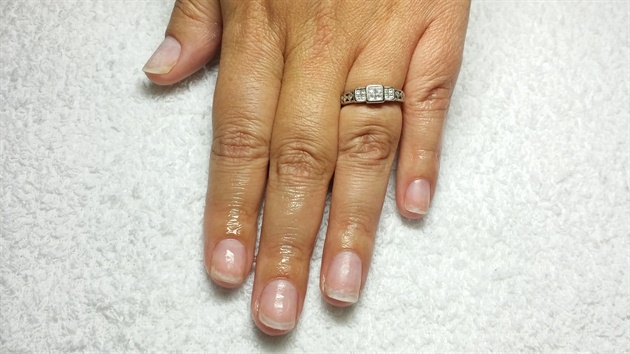
Clean and prep your nails for acrylic application. Gently buff nail plate to remove all shine, then cleanse.
2
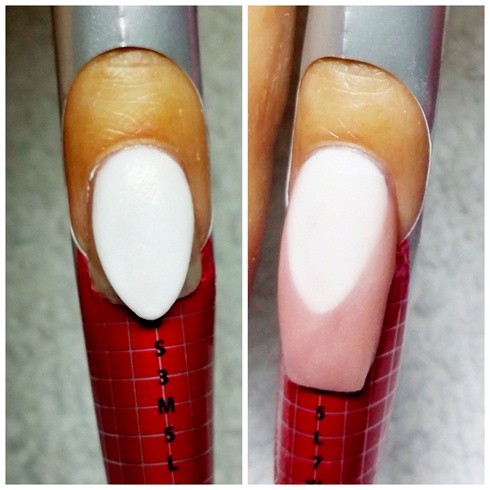
On the ring fingers of each hand, apply nail form. Using acrylic, sculpt the nail bed in an almond shape using CNDs retention plus white powder acrylic. Then apply INMs cover pink to create the nail tip. This will give you my reverse French design.
3
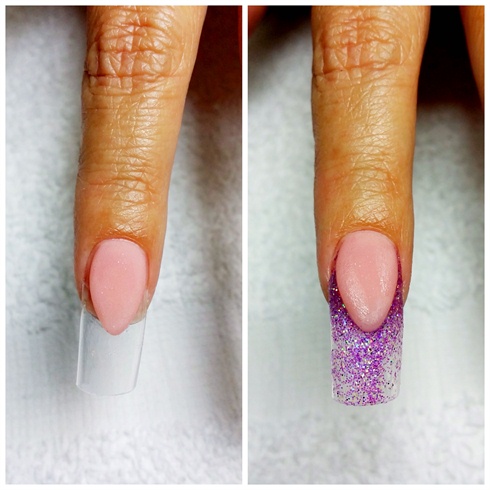
On the rest of the fingers apply crystal clear tips. I chose to use tips on these fingers to create a glass look and a sturdy base to support the 3D encapsulated art you will see in step 4. Using acrylic, sculpt the nail bed in an almond shape using INMs cover pink. Then apply a thin layer of sparkle purple acrylic to the nail tip. Keep this tight around the sculpted nail bed and blend down the tip.
4
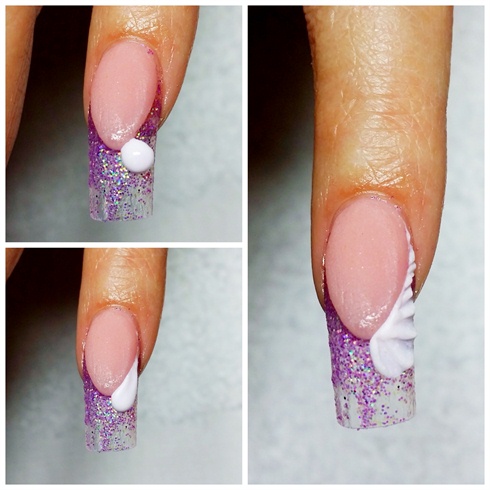
To create the 3D sculpted wings, use CNDs retention plus white powder acrylic. Take a small pearl on your brush and remove moisture by dotting the back of your brush on a paper towel. This ensures that your pearl is not too wet and a little stiff, which is ideal for sculpting. Place the pearl at the tip of the sculpted nail bed. Drag the pearl gently down the side of the sculpted nail bed towards the cuticle. Pat the acrylic flat. Wet your brush and smooth it out on a paper towel. Roll and push the acrylic up using the sharp side of the brush to create the texture of each wing. Repeat this on the reverse side of the nail. Continue this process for each nail. Once wings are sculpted and cured, use a diluted pastel purple acrylic paint to couture the depth in the wings. This allows you to see the dimension of the wings after you apply the gel top coat in step 6.
5
Apply thin coat of CNDs Brisa sculpture gel to each nail to build the rest of the nail, encapsulate the wings, and give a crystal clear glass like top. Cure the gel under a UV light. File, shape, buff the nails and cleanse.
6
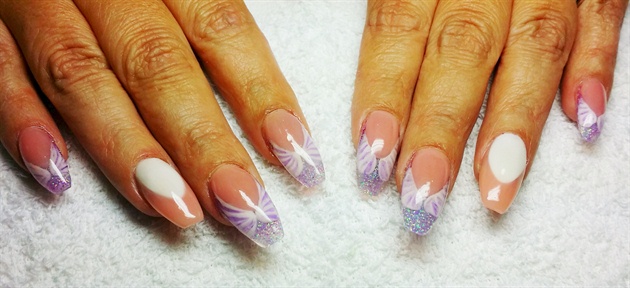
Apply a thin layer of gel top coat polish and cure under UV light.
7
Using CNDs Brisa sculpture gel and a toothpick, apply a small dot of the gel in the center of the wings where they meet. Apply one Swarovski crystal to each nail and cure under UV light and cleanse.
8
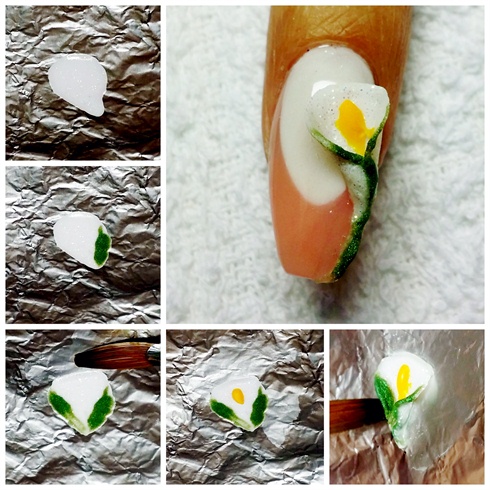
Use INMs 3D sculpture acrylic in glitter white to begin your calla lily. Lay the pearl on a piece of foil and pat the pearl flat into a fan shape. Apply green sculpture acrylic to the outer edges of the fan shape. Next apply a small yellow acrylic pearl to the center and drag down. Before the acrylic is completely hardened, wet your brush and begin to pull the outer edges over the center to create the calla lily shape. Take a crystal clear acrylic and apply to the ring finger nail. Before your calla lily is completely cured, pick up with a damp brush and attach to nail. You will be able to mold, form and position your flower shape before it is cured. Be careful not to cover the center of your perfect pink and white smile line.
9
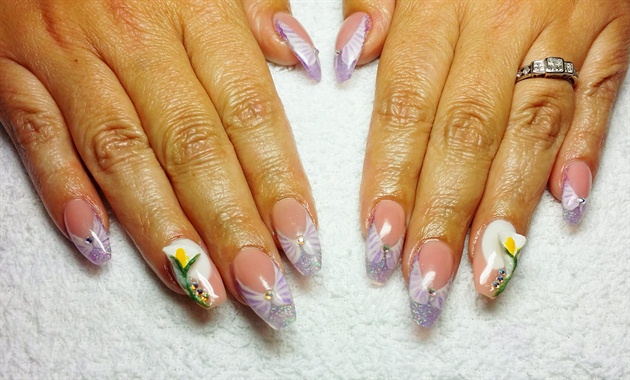
Accent your calla lily with Swarovski crystals. Your look is complete!
6 Artists like this Photo
Write a Comment
Submit