nailsntnatop24Photos
237
0
1
Posted on 10-30-2017
Spring Floral
by NinaB
Posted on Apr 13, 2024
17 Views | 0 Likes 0 Comments
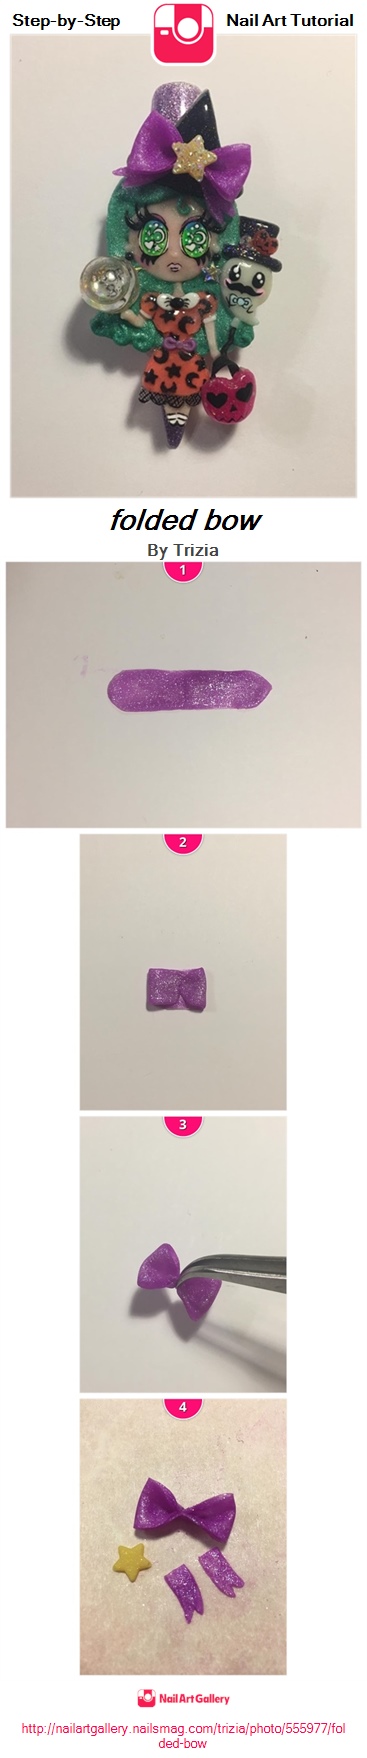
<a href='http://nailartgallery.nailsmag.com/trizia/photo/555977/folded-bow?ref=side-embed'><img src='http://s3photo.nailartgallery.nailsmag.com/7fde32bb-9221-483e-b42d-ce7ce0e18102_set.jpg' alt='folded bow - Nail Art Gallery' /></a> Copy and paste the embed code above to put this step-by-step nail art tutorial on your web site.
1) Lay down 4 beads of acrylic with a size 10 acrylic brush to create the oversized folded bow in her hat. Shape the beads into a ribbon.
2) Before the acrylic has completely cured fold each end in so they meet in the middle.
3) Still before the acrylic has fully cured take a pair of tweezers and pinch the bow in the middle to create the folds.
4) Separately make the two ribbons that go under the bow and the star for the center of the bow. Assemble on hat and add Swarovski pixie to star for extra pizazz.