Konstantina'sPhotos
1397
0
1
Posted on 07-22-2015
Cold Flags, Warm World
by Cr8tive1
Posted on Apr 24, 2024
12 Views | 0 Likes 0 Comments
Cold Flags, Warm World--Toes
Spring Thermal
by NinaB
Posted on Apr 21, 2024
14 Views | 0 Likes 0 Comments
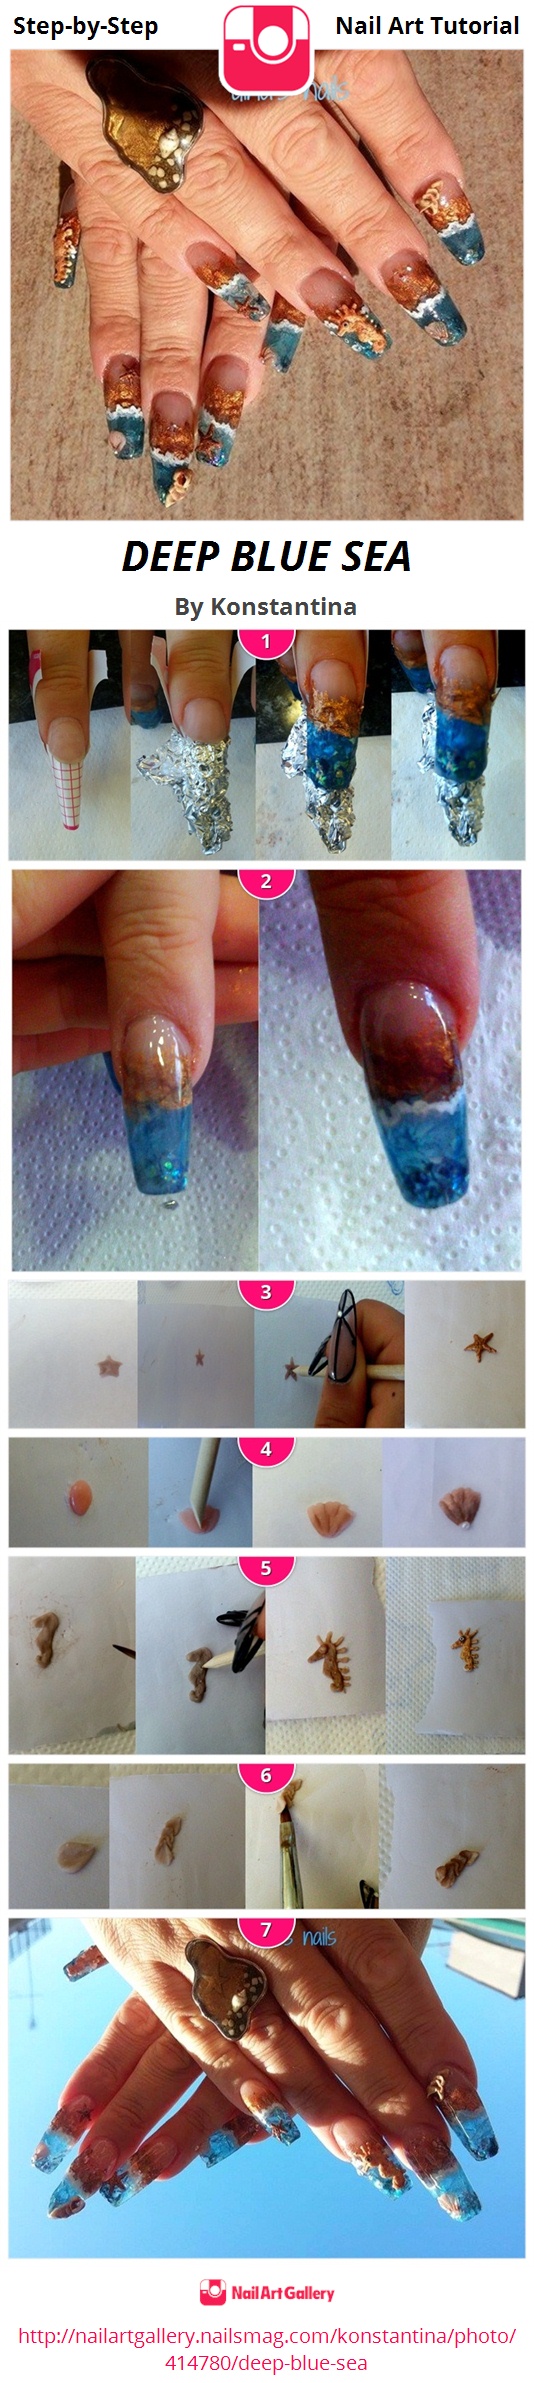
<a href='http://nailartgallery.nailsmag.com/konstantina/photo/414780/deep-blue-sea?ref=side-embed'><img src='http://s3photo.nailartgallery.nailsmag.com/0cdc3d92-5cce-460b-b5ea-739ed1683e87_set.jpg' alt='DEEP BLUE SEA - Nail Art Gallery' /></a> Copy and paste the embed code above to put this step-by-step nail art tutorial on your web site.
First of all, I prepped the natural nail and placed the form. Between the nail and the form, I placed some crimpled foil to give a cracked effect so that it will look like the waves. I used CND pigments to give the sand effect and on the free edge I added glitter powder.\n
I enclosed the whole nail enhancement with clear acrylic powder and filed it smooth, finishing with a buffer. I then used some white acrylic paint to make the wave foam by tapping lightly with a very thin brush and watering the paint to give a fading effect.
For the starfish, I took a big bead of acrylic and with my brush, I pulled the product, while it was still wet, to form the spikes. With an orange stick, I made some holes and then I added some bronze glitter.
To form the sea-shell, I took a bead of acrylic and spread it open like a fan and then I pressed with an orange stick to make lines. I added some bronze color to the lower part of the pearl.
I picked up a large amount of acrylic powder to build the sea-horse and with an orange stick I made some holes on it. I placed another smaller bead to form the mouth. I draw lines with acrylic paint around the body. I picked up a tiny bead of white acrylic powder to make the eye and then I colored it with acrylic paints.
To form the conch I took a small bead of acrylic and shaped it like a leaf. Then, I added 3 more beads of the same shape and I placed them one right on top of the other. I added another small bead to form the opening and I colored with acrylic paints.
crazy summer nails are done!!!