All Photos
11359
6
40
Posted on 04-04-2014
Cold Flags, Warm World--Toes
by Cr8tive1
Posted on Apr 24, 2024
13 Views | 0 Likes 0 Comments
Spring Thermal
by NinaB
Posted on Apr 21, 2024
14 Views | 0 Likes 0 Comments
Cold Flags, Warm World
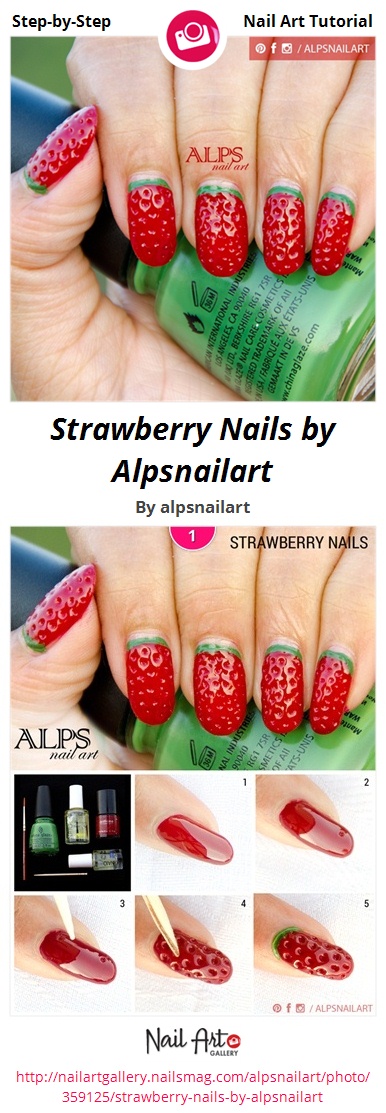
<a href='http://nailartgallery.nailsmag.com/alpsnailart/photo/359125/strawberry-nails-by-alpsnailart?ref=side-embed'><img src='http://s3photo.nailartgallery.nailsmag.com/62781f90-720e-4d99-8745-62a0f8f31200_set.jpg' alt='Strawberry Nails by Alpsnailart - Nail Art Gallery' /></a> Copy and paste the embed code above to put this step-by-step nail art tutorial on your web site.
1. Apply red nail polish over a base coat…….\n2. Paint multiple coats of red polish to build up the required thickness. Apply a layer of top coat in between each coat to prevent red getting too dark. …...\n3. Check the depth using a toothpick. If required apply additional coats. More the coats, better would be the texture. …….\n4. When the polish is 90% dry, use the toothpick to create the texture. …….\n5. With the help of a thin nail art brush, draw a green curve on the cuticles. …...\n\nTips…...\n\n6. Incase you get a smudge don't start all over again. Simply apply an additional coat. …….\n7. Since my polish was very thin, I have applied here 10 to 12 coats including top coat. Using cream polish would help get thick layer in fewer coats. …...\n8. Optional - You may place tiny caviar balls for the seeds…….. \n