Our first pre-challenge is sponsored by Swarovski Crystals and is themed "Day of the dead' or Dia de Muertos which is the literal translation for All Souls' day, the Catholic holiday. Those who celebrate it believe that the souls of the deceased come down from "heaven" to reunite with their families. Dai de Muerto really is a festive celebration filled with colour, candles, and food. In the 16th century, the celebration evolved to incorporate elements of Christianity and this is where I took inspiration for my piece. A Sugar skull and candle in the style of A stained glass, cathedral window. I was able to use and place my tips in the shape of the window which I feel really brought my design to life, the crystals were the icing on the cake and married it all together.
Step-by-Step Nail Art Tutorial
1
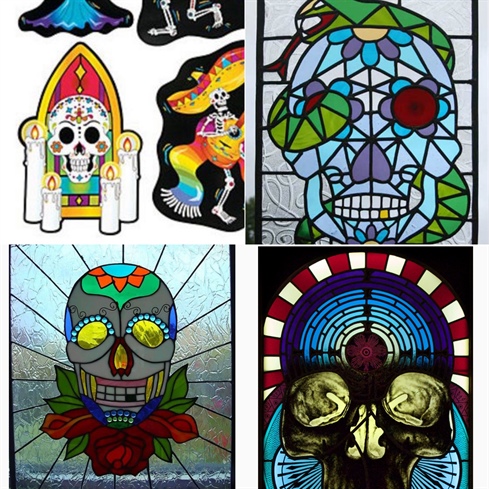
These images are where i took my visual inspirational from.
2
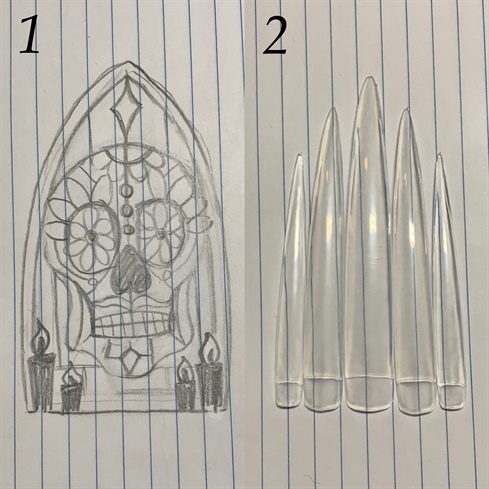
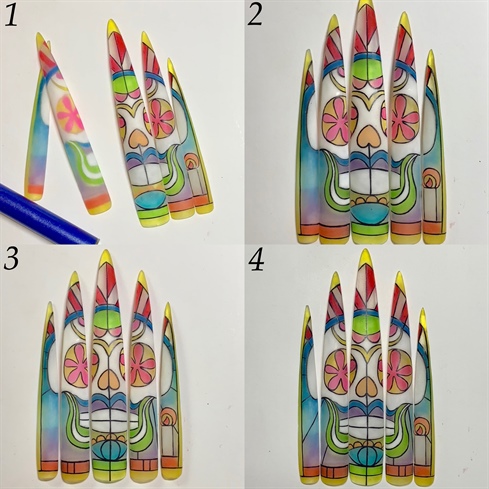
1: on a piece of paper roughly sketch out your design, this doesn't need to be perfect as it is only really for reference. \n2: for this design to be fully effective I selected long stiletto tips in different sizes to portray in shape the cathedral window. You can choose to use any sized tips, just as long as they are clear.
3
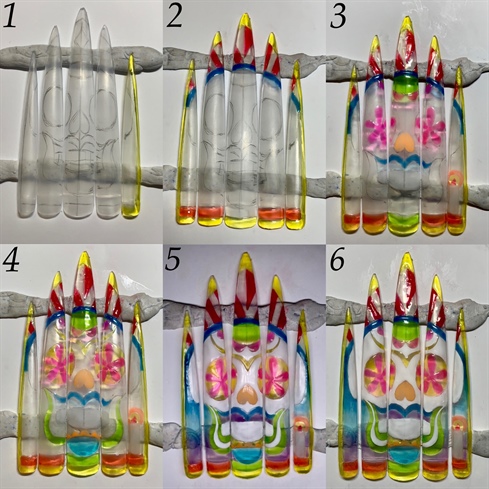
1: Remove the shine from the tips using a 240 buffer, once that is done clean off the dust. Using bluetac to hold the tips in place, set them how you would like them. You can now sketch the design over the tips, I have used a push pencil for easy removal because you don't want the sketch to show through in the finished design.\n2-4: Once happy you can begin a little paint by numbers, dont forget to use a mixture of colours to create depth and contrast. I used a specificly formulated glass gel, but you can mix a colour gel with a clear gel to get the same effect. I've found jelly; not cream gels work best. \n5-6 I've just noticed these are the same step in the image, but I wanted to point out the ombre effect that I've done in the background, I did this by merging 3colours to show more skill and depth in the piece.
4
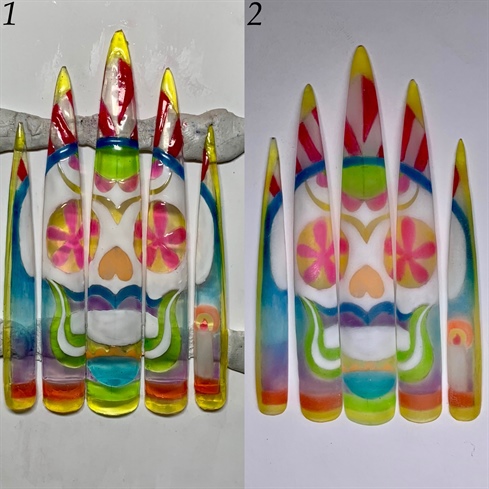
1: Once completely coloured you may find it resembles a cluster of small mounds and valleys, but don't panic.\n2: Apply a generous layer of hard gel over all the tips, this will smooth over where the colors meet and give a more consistent and flush finish. Then file and buff smooth remembering to remove all dust. Now it's coming together!
5
1-2: Now its time to outline. For this, I've used a mix of acrylic paint colours to make a dark grey; I did this to avoid using black as I felt it would be too stark. You may choose to use black on your piece; it was my preference to use the grey. \n3-4 Now the base of the design is outlined you can go ahead and start to create more glass panels for a real stained glass windowpane effect. I took direction from my inspirational images but you could put these where ever you like. once done, dont forget to doa layer or two of a non wipe top coat.
6
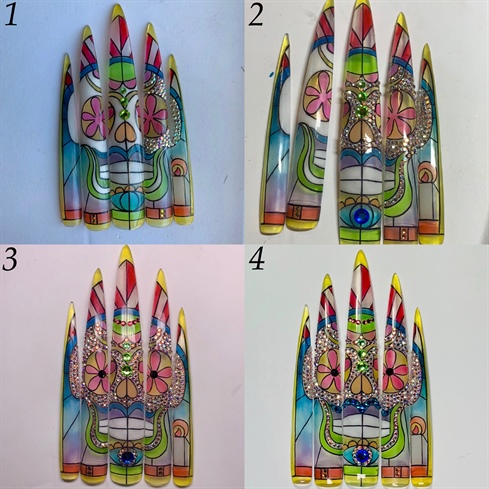
1-4 Now the real fun begins... I decided to cover the white parts of the sugar skull in small SS3 Swarovski crystals with a few colours crystals for added dimension and sparkle. you can really let your heart go wild at this point. My the only tip here is to be careful to not lose the stained glass effect.
13 Artists like this Photo
Write a Comment
Submit