Minx asked us to create a winning design on the front of 10 nails, along with an equally artistic and complimentary design on the backside! Knowing my daughter would be my hand model, my first thought for inspiration would be her beautiful, aqua, and blinged out, homecoming dress. This would not only complete her look, but would make all her friends envious and want to visit my chair for some homecoming bling for themselves!
Step-by-Step Nail Art Tutorial
1
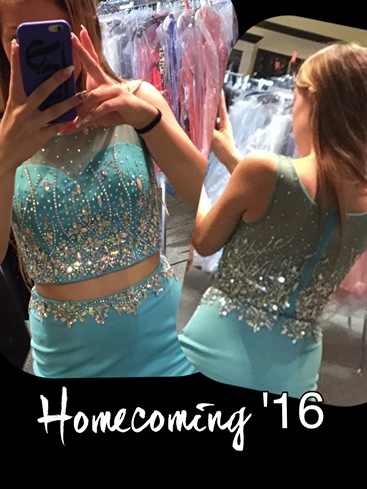
Minx asked us to create a winning design on the front of 10 nails, along with an equally artistic and complimentary design on the backside! Knowing my daughter would be my hand model, my first thought for inspiration was her beautiful aqua, blinged out, homecoming dress!
2

I began by rebalancing and extending the length on the sculpted gel set.
3
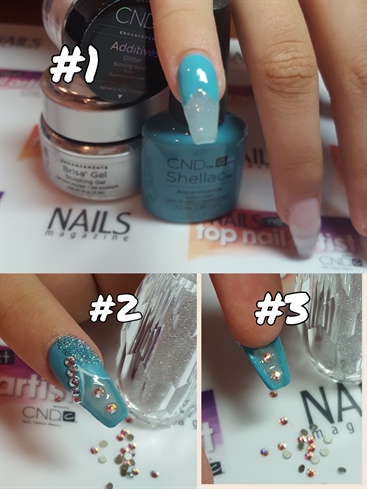
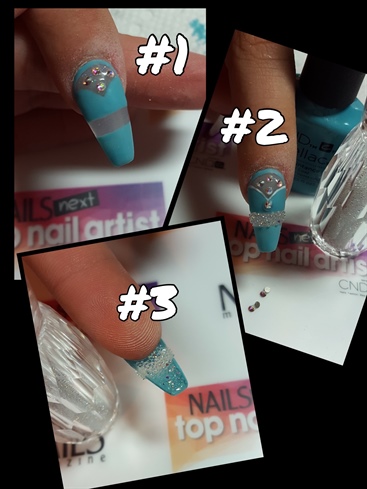
PINKIES! #1: I wanted to have sheer sparkly areas, just like the dress, on the pinky and ring fingers. I created that by mixing sculpting gel, additives, and gel polish, applied and cured. Then painted on the matching gel polish, in the sweetheart neckline shape of the dress, and outlined the bottom half of the nail. #2: I added in the AB Swarovski rhinestones, AB Swarovski Crystal Pixies, and hand painted gel polish details. #3: Flipped the nail over, gave it the same sparkly base, outlined details, and added the Swarovski rhinestones on the same areas as the front.
4
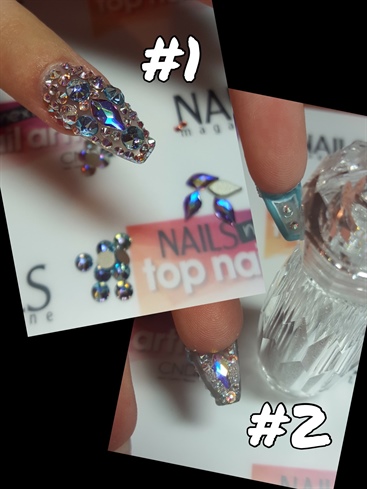
RING FINGERS! Bring on the BLING! #1: I used aquamarine AB Swarovski crystals, and regular AB Swarovski crystals to create a pattern that compliments the dress! #2: Don't forget the backside blling! I added some of the same AB crystals along with more Swarovski Crystal PIxies.
5
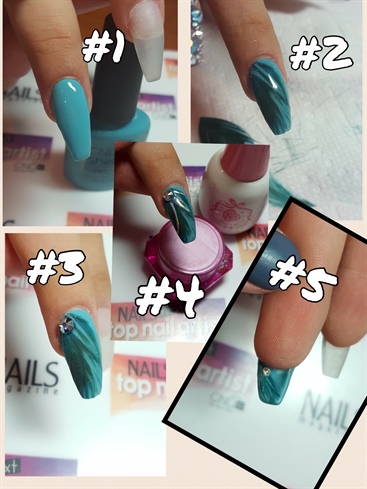
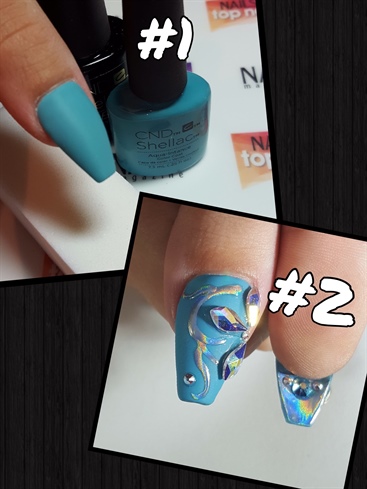
MIDDLE FINGERS! A matte finish feather nail would DEF be cool! #1: I started with 2 coats of gel polished, cured, gel top coat, cured. #2: I added the feather with sculpting gel, and cured. #3: I lightly buffed the nail to matte finish and added a Swarovski crystal. #4: I wantednto give some more AB looks to this, so I added in some feathered looking lines with hologram pigment, and to keep the matte finish on the nail, I only put the top coat over each individual line after applying the hologram pigment. #5: Feathered backside! Used same technique as front, but added ONLY the Swarovski crystal.
6
POINTERS! #1: I started with the sheer custom gel mix sweetheart neckline once again, but at the top, and outlined it once again, and added the Swarovski crystals, but wanted to bring in the bare midsection this time! #2: I added the Swarovski Crystal Pixies in the bare mid section, because I'm not a huge fan of it being bare on the dress, lol. #3: Completed the look with Swarovski Crystal Pixies on the whole back side!
7
THUMBS! #1: 2 coats of gel polish, cured, gel top coat, cured, and lightly buffed to a matte finish. #2: Using same technique as middle finger with the hologram pigment, I drew on a swirl pattern, and added some Swarovski AB crystal details to match the dress! Flipped the nail over and decided it needed a full hologram touch with some Swarovski AB crystal details!
8
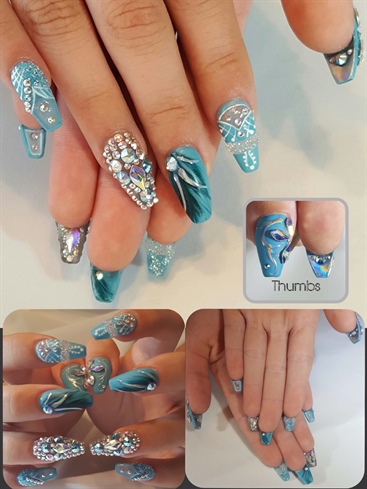
We needed some finishing touches by adding in some white gel polish fine line details, matte gel polish top coat on all areas but bling, and we are Homecoming ready!!!
13 Artists like this Photo
Write a Comment
Submit